Sweet, tangy, and tucked into a perfectly flaky gluten free crust—this strawberry rhubarb pie is a must-bake for spring and summer. Bursting with fresh fruit flavour and made entirely gluten free, it’s the perfect dessert for picnics, family gatherings, or just because. Whether you’re new to gluten free baking or a seasoned pro, this pie delivers all the nostalgic flavour with none of the gluten.
Why strawberry and Rhubarb?
Strawberry and rhubarb are a classic pairing because they perfectly balance each other out—rhubarb’s tartness plays beautifully with the natural sweetness of strawberries. Rhubarb on its own can be quite sour, but when combined with juicy, ripe strawberries, it transforms into a bright, flavourful filling that’s both tangy and sweet.
It’s also a seasonal match made in heaven: both strawberries and rhubarb come into season around the same time in late spring, making them a go-to combo for fresh, early-summer baking. The result? A nostalgic, vibrant pie filling that’s just the right mix of comforting and refreshing.
ingredients
Here are the ingredients you will need to make these.
- Gluten Free Pie Crust: I have two recipes to choose from. All butter pie crust or a classic flaky pie crust
- Rhubarb
- Strawberries
- Sugar
- Corn Starch
- Bob’s Red Mill 1-1 Gluten Free Flour
- Lemon Zest
- Lemon Juice
- Vanilla
- Dots of Butter
- Egg Yolk
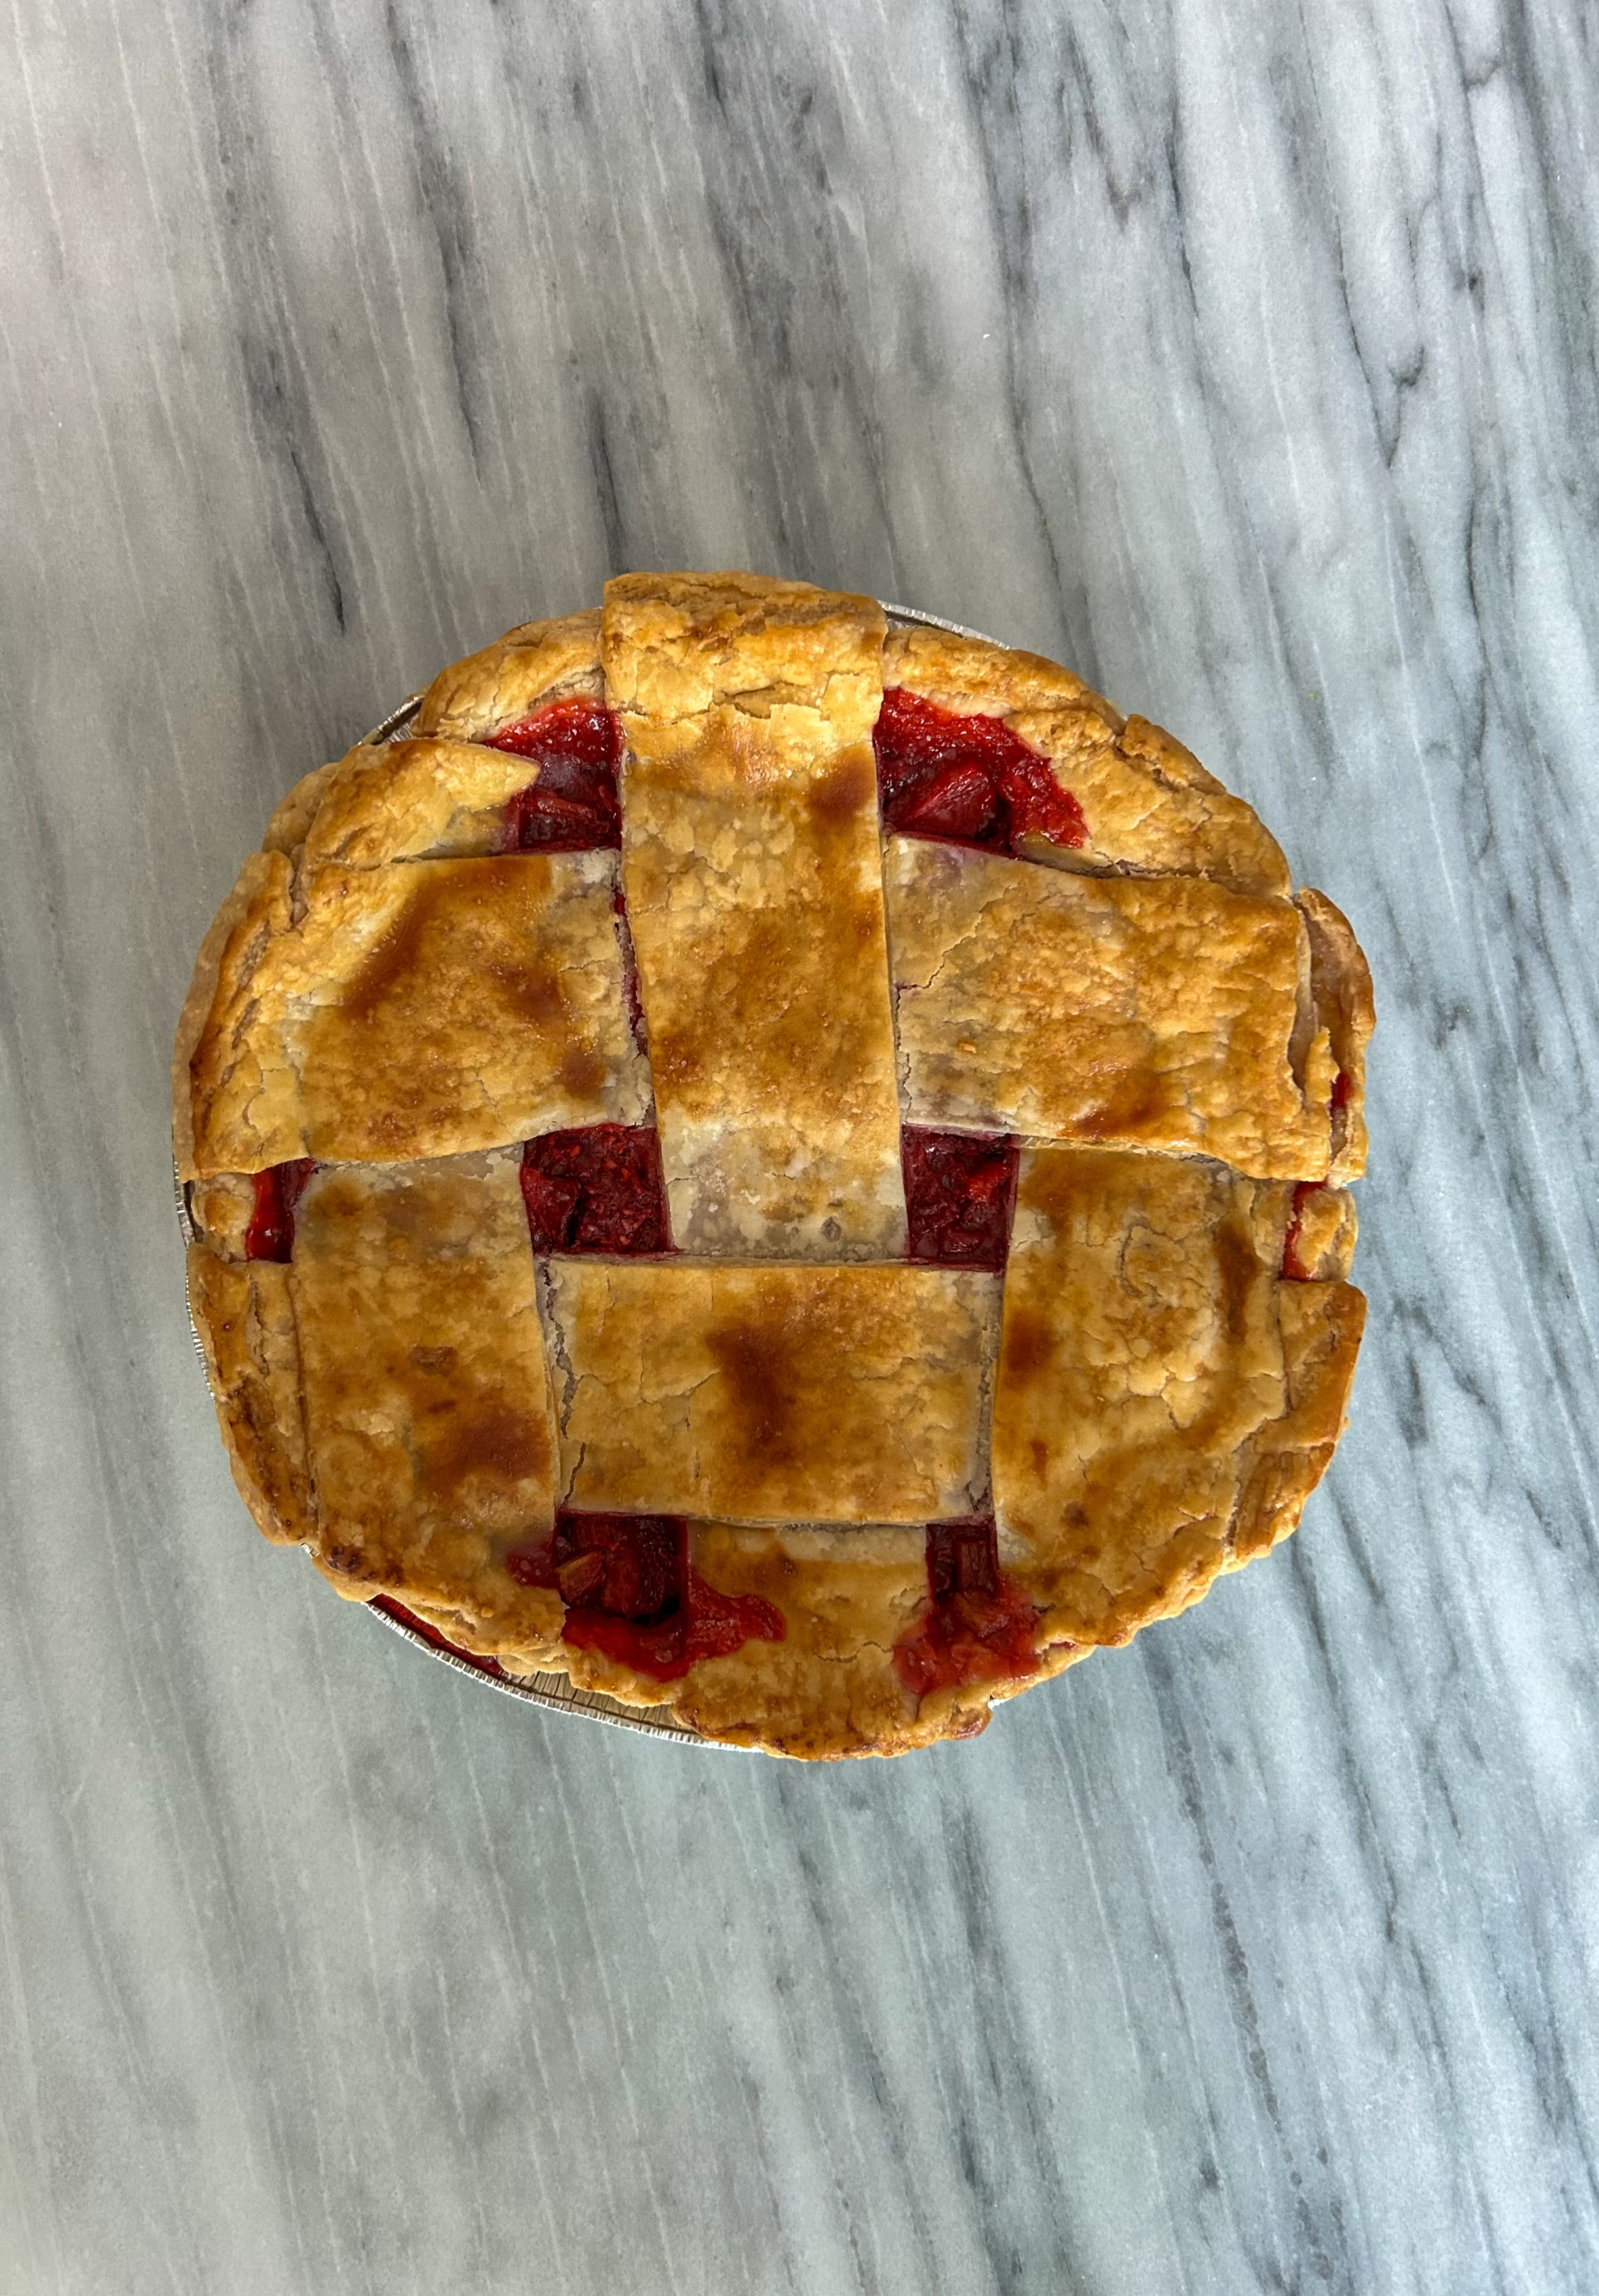
Laura’s Tip: to a golden brown pie crust
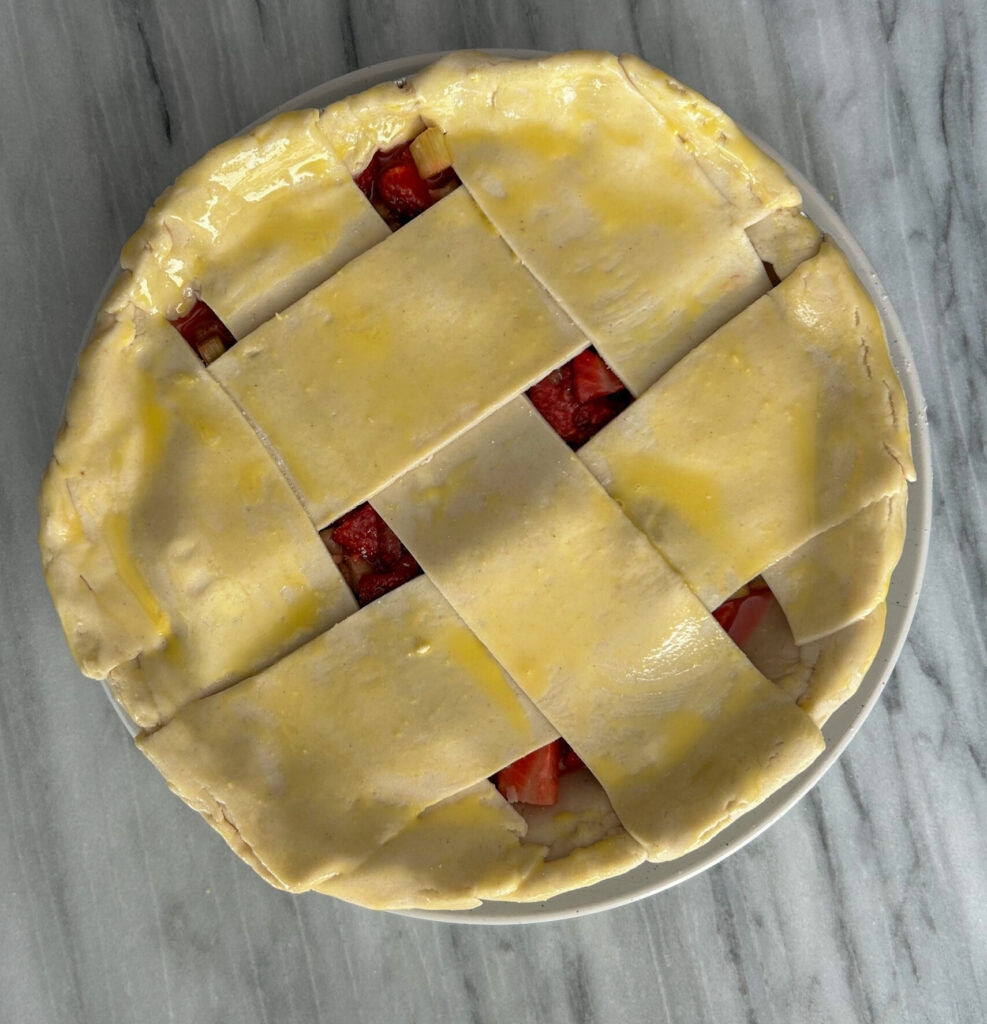
In a small bowl, whisk one egg yolk like you’re making scrambled eggs. Just before baking, brush it over the top of your pie crust for a gorgeous, golden brown finish. It gives your gluten free crust that classic bakery-style look!
Storing
At Room Temperature (Short-Term)
- You can store it covered at room temperature for up to 2 days.
- Use foil, beeswax wrap, or a cake dome to keep it lightly covered—this helps preserve the crust texture while keeping the filling from drying out.
- In the Fridge:
For longer freshness, store the pie in the fridge for up to 4 days. - Cover it with plastic wrap or foil. To keep the crust crisp, you can reheat individual slices in a low oven (300°F for about 10 minutes).
In the freezer: Thaw overnight in the fridge, then reheat in the oven at 325°F for 15–20 minutes to crisp up the crust.
To freeze, let the pie cool completely. Wrap it tightly in plastic wrap and then foil, or place it in a freezer-safe container. It’ll keep for up to 3 months.
Gluten Free Strawberry Rhubarb Pie
Ingredients
- 1 Top and Bottom Pie Crust (Check above for a gluten free pie crust.)
- 325 Grams Chopped Rhubarb (roughly 2.5 cups)
- 415 Grams Chopped Strawberries (roughly 2.5 cups)
- 200 Grams Sugar
- 30 Grams Corn Starch
- 10 Grams Bob’s Red Mill 1-1 Gluten Free Flour or Adent Mills Gluten Free Flour
- ½ Lemon Zest
- 30 Grams Lemon – Juiced
- 3 Grams Vanilla
- Dots of Butter
- 1 Egg Yolk
Instructions
- Add in the strawberries, rhubarb, corn starch, flour, vanilla, sugar, lemon juice and lemon zest into a bowl. Stir to combine. Place it into the fridge.325 Grams Chopped Rhubarb (roughly 2.5 cups), 415 Grams Chopped Strawberries (roughly 2.5 cups), 200 Grams Sugar, 30 Grams Corn Starch, 10 Grams Bob’s Red Mill 1-1 Gluten Free Flour or Adent Mills Gluten Free Flour, 1/2 Lemon Zest, 30 Grams Lemon – Juiced, 3 Grams Vanilla
- Make the pie dough as per your dough recipe and place it into the fridge to chill the dough.1 Top and Bottom Pie Crust
- Remove the dough from the fridge and roll it out as per your dough recipe. Add it into the pie plate.
- Remove the berry mixture from the fridge. Using a slotted spoon, add only the fruit into the pie plate and not all the liquid. Discard the liquid.
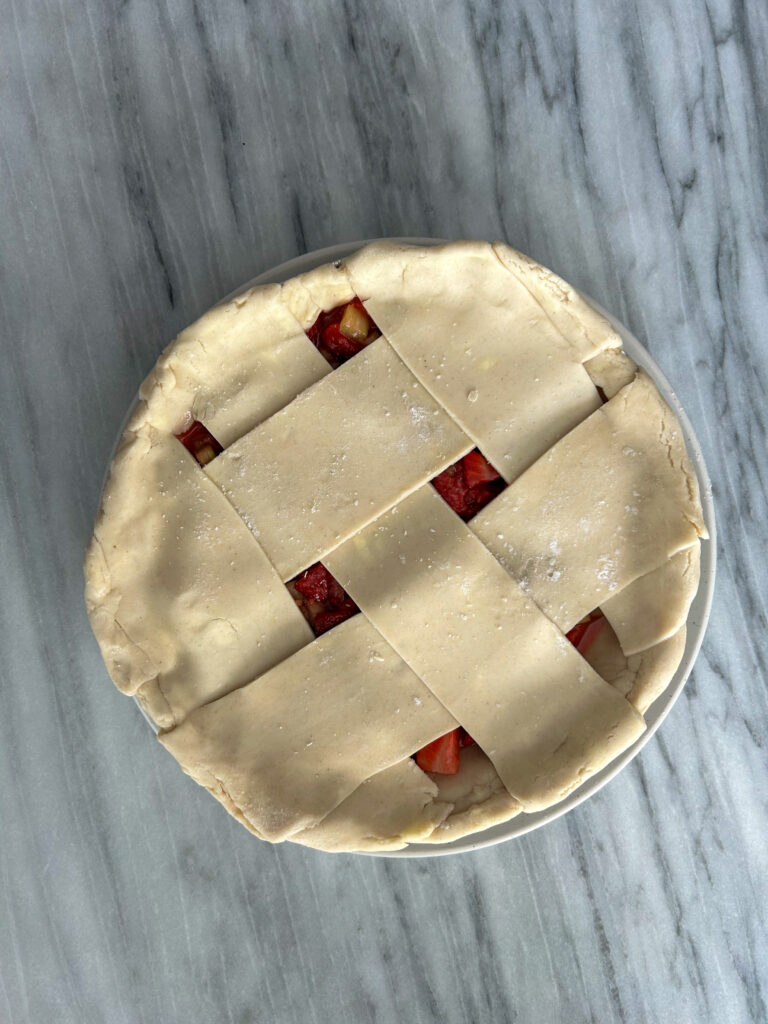
- Roll out the top dough, and add it onto the top of the pie with whatever design you would like. Right before topping it, dot it with some butter.Dots of Butter
- Place the pie plate into the freezer.
- Preheat the oven to 425F.
- Once the oven is preheated, remove the pie from the freezer. In a small bowl, whisk an egg yolk. Brush the egg yolk onto the pie crust. Add the pie onto a baking sheet to make transport easier into the oven and then place into the oven for 15 minutes.1 Egg Yolk
- After 15 minutes, reduce the temperature of the oven to 375F for 45-50 minutes. If it is browning too quickly put a piece of tin foil on top.
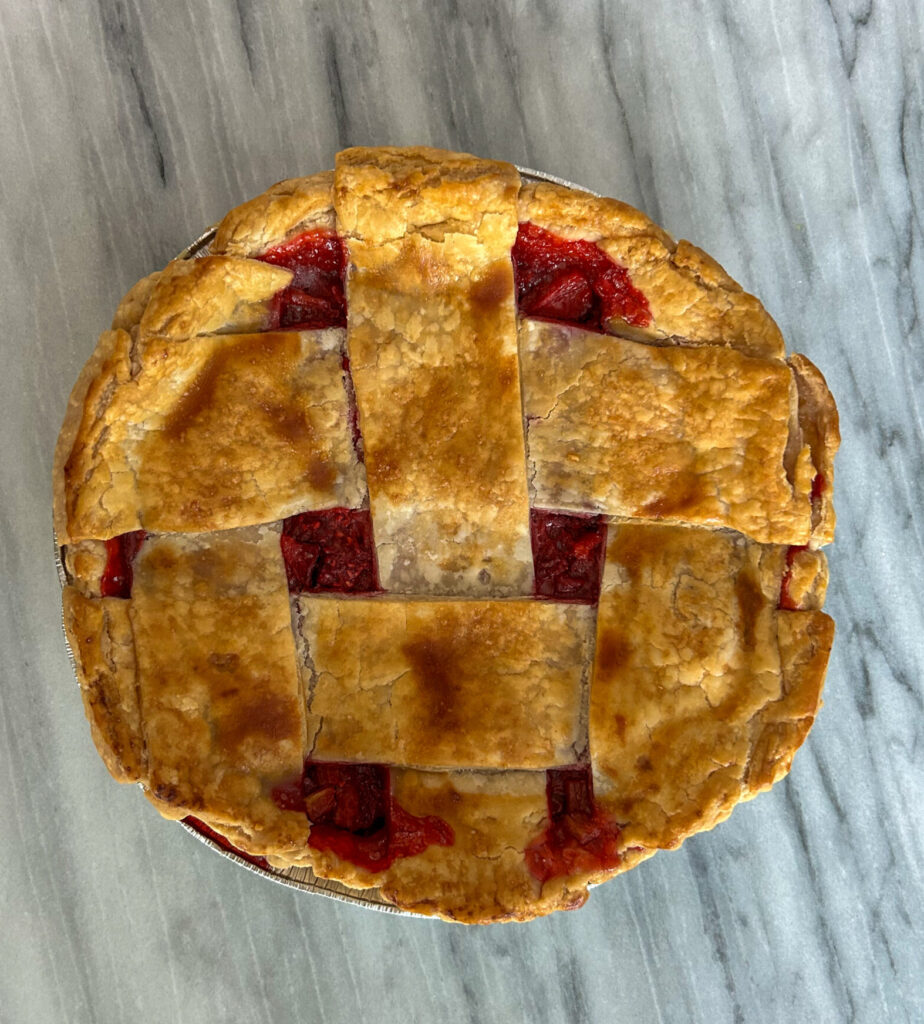
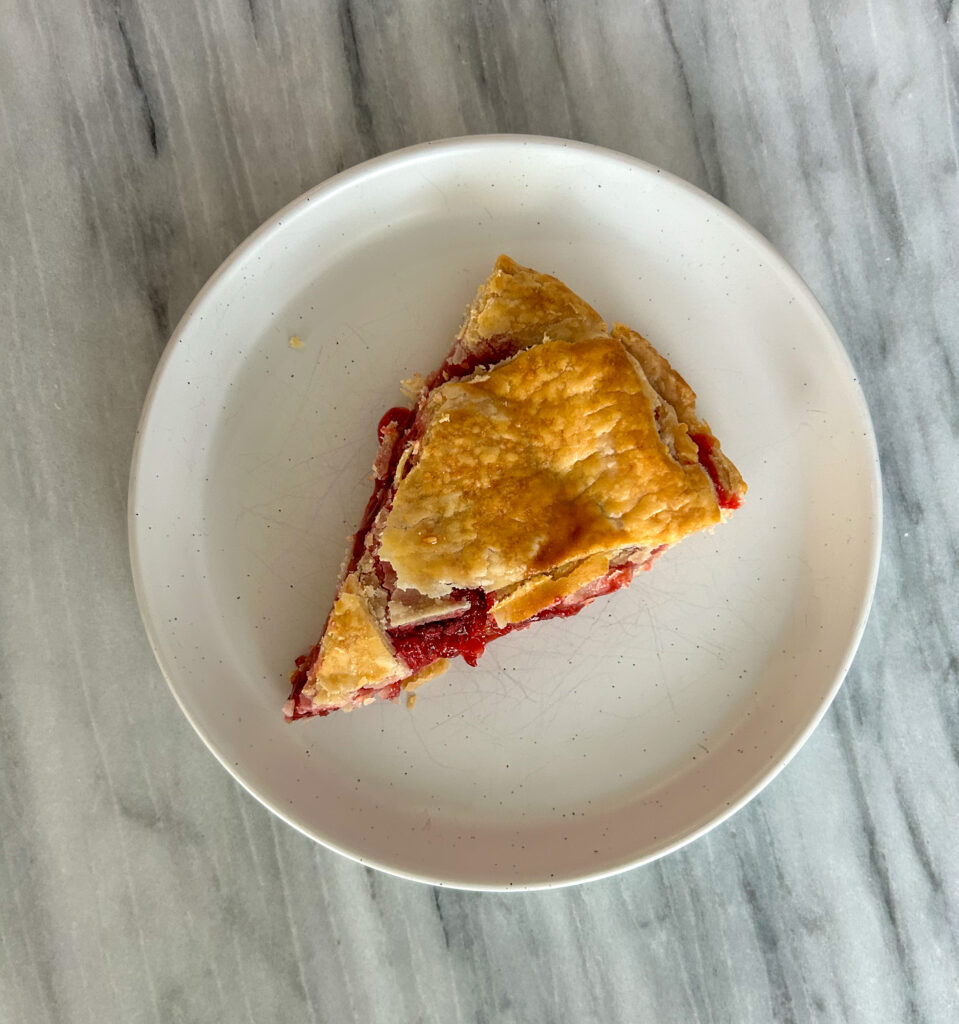
- Remove it from the oven once it is golden brown, bubbling and delicious. Let it cool for at least 2 hours until the inside is jammy.
Did you make this recipe?
Lovely. Now let me know how you liked it and how easy it was to bake. Tag @laurabakesglutenfree on Instagram and hashtag it #laurabakesglutenfree.
While I have you here, may I suggest few you try next:
Until next time. Keep following and commenting. Join me on Instagram, where I will be revealing my secret tips and tricks! Yes, that’s right!