If you’re looking for a show-stopping gluten free dessert, these chocolate cupcakes deliver in every bite. Rich, moist, and deeply chocolatey, they’re made even more indulgent with a surprise filling of salted caramel sauce tucked inside—though you can absolutely enjoy them plain, too! Each cupcake is topped with a silky whipped chocolate caramel ganache that takes them over the top. Whether you’re baking for a celebration or just treating yourself, these gluten free cupcakes are guaranteed to impress.
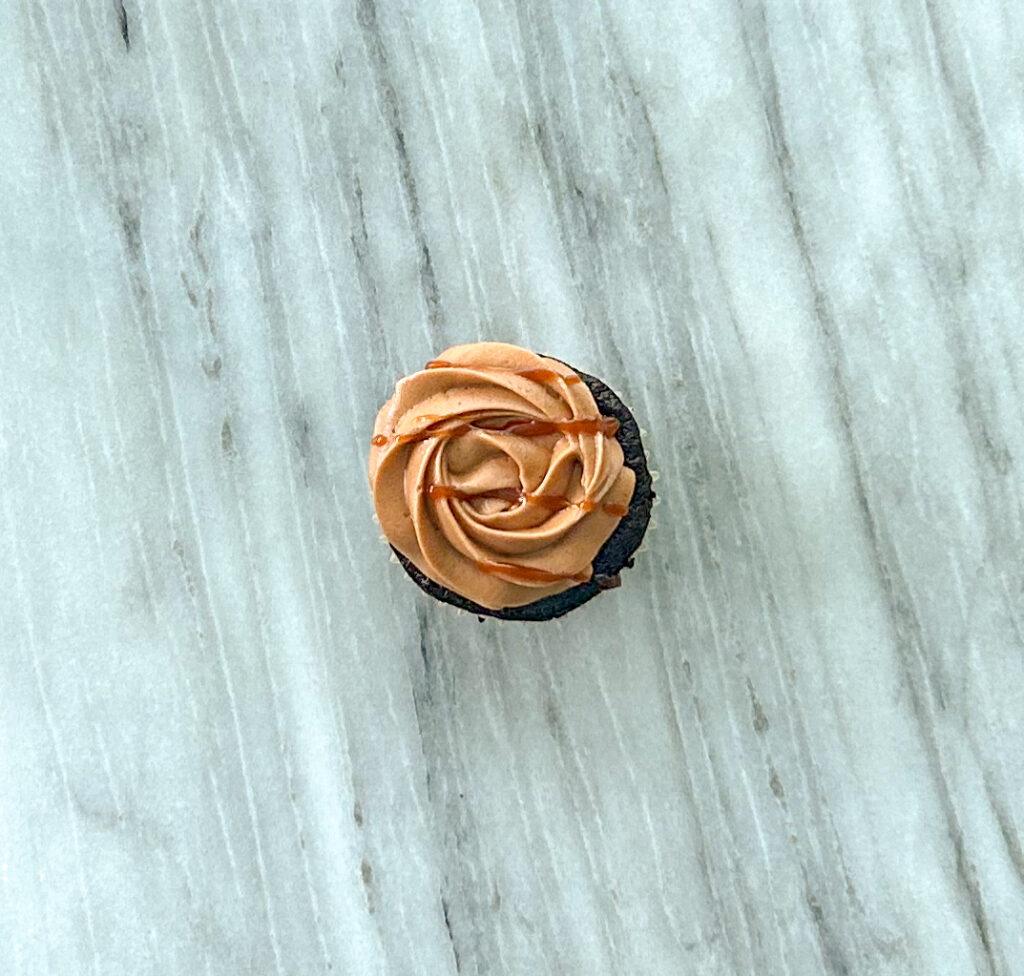
Moist, CHOCOLATEY and filled with caramel
The real magic in these cupcakes is hidden inside—each one is filled with a rich, gooey salted caramel sauce that adds a perfect contrast to the dark chocolate base. The sweet-salty combo takes these gluten free treats to the next level, adding depth and surprise in every bite. The salted caramel sauce is very easy to make, and the recipe can be found here.
ingredients
Here are the ingredients you will need to make these.
- Salted Caramel – 1/2 batch for 12 cupcakes
- Bob’s Red Mill 1-1 Gluten Free Flour
- Hot Brewed Coffee (or hot water and instant coffee)
- Dark Chocolate
- Sugar
- Cocoa Powder
- Baking Soda
- Baking Powder
- Salt
- Egg
- Olive Oil (you can use coconut oil, canola oil instead)
- Buttermilk: I like to use powdered buttermilk that you mix with water before adding to a recipe since I never use a full container to buttermilk so it will go to waste. The powdered buttermilk is a lifesaver.
- Vanilla
- Whipping Cream

Laura’s Tip: TRansporting Cupcakes

I typically transfer my cupcakes in a cupcake carrier, however there are times when I am transporting them without my carrier. The cupcakes will flop around without one. I create my own, I use a standard cake box with tape slightly raised so it will hold the cupcakes so they do not shift.
Storing

Storage (Up to 4–5 Days)
- Keep frosted and filled cupcakes in the refrigerator, covered in an airtight container.
- Bring them to room temperature before serving for the best texture and flavour.
Freezing (Unfrosted or Frosted)
Thaw at room temperature and add fresh ganache or a caramel drizzle before serving if needed.
Freeze unfrosted cupcakes individually wrapped in plastic wrap, then place in a freezer bag or container.
For frosted cupcakes, freeze them on a tray first, then wrap and store.

Gluten Free Chocolate Cupcakes
Ingredients
Chocolate Cake
- 120 Grams Hot Brewed Coffee (If you do not have coffee on hand, you can use hot water and 8 grams of instant coffee.)
- 30 Grams Dark Chocolate
- 200 Grams Sugar
- 118 Grams Bob’s Red Mill 1-1 Gluten Free Flour or Adent Mills Gluten Free Flour
- 60 Grams Cocoa Powder
- 2 Grams Baking Soda
- 2 Grams Baking Powder
- 1 Gram Salt
- 1 Egg
- 60 Grams Olive Oil
- 120 Grams Buttermilk
- 2 Grams Vanilla
Caramel Chocolate Whipped Ganache
- 190 Grams Chocolate (If kids are eating the cupcakes, I use milk chocolate, if you want them more rich, I will use dark chocolate.)
- 150 Grams Whipping Cream
- 30 Grams Water
- 85 Grams Sugar
- 15 Grams Corn Syrup
- 190 Grams Butter
Caramel Sauce
- ½ Batch Caramel Sauce (Recipe found on my blog)
Instructions
Cupcake
- Preheat the oven to 325F. Prepare you cupcake tin with cupcake liners.
- In a bowl, add in the hot coffee and chocolate. Stir to combine until it is melted.120 Grams Hot Brewed Coffee, 30 Grams Dark Chocolate
- Add in the cocoa powder to bloom the chocolate.60 Grams Cocoa Powder
- Then add in the sugar and whisk to combine.200 Grams Sugar
- Add in the egg.1 Egg
- Next add in the dry ingredients – flour, baking soda, baking powder, salt.118 Grams Bob’s Red Mill 1-1 Gluten Free Flour or Adent Mills Gluten Free Flour, 2 Grams Baking Soda, 2 Grams Baking Powder, 1 Gram Salt
- Stir in the olive oil, buttermilk and vanilla.60 Grams Olive Oil, 120 Grams Buttermilk, 2 Grams Vanilla
- Once everything is combined, it will be like a thinner brownie batter. Using an ice cream scoop, scoop the batter into the prepared cupcake tin with liners. Fill them 3/4 full.
- Put them into the oven for 35 minutes until a toothpick comes out clean with a couple crumbs.
Caramel Sauce
- Once you put the cupcakes into the oven, start making the caramel sauce. You only need a half batch of it from my recipe. Place it into the fridge until you are ready to use it.1/2 Batch Caramel Sauce
Ganache
- Once the caramel is made, start making the ganache while the cupcakes are in the oven.
- In a pot, put water, corn syrup and sugar together. Do not stir. Place it over a low/medium heat and let it bubble until a light caramel colour.30 Grams Water, 85 Grams Sugar, 15 Grams Corn Syrup
- While the sugar pot is coming to caramel colour, put the whipping cream into the microwave for 45 seconds or until it is hot.150 Grams Whipping Cream
- Once the sugar mixture is at caramel colour, turn off the heat. Slowly pour in the hot whipping cream. It will bubble up, now you can mix it up until all the bubbles disappear and it is a caramel sauce.
- Put the chocolate into a bowl and pour over the caramel into the bowl. Stir to combine and melt the chocolate. Once the chocolate is melted, cover and set aside until it is room temperature.190 Grams Chocolate
Cupcakes
- Once the cupcakes are done, remove them from the oven and let them cool in the pan.
- Once the cupcakes are cooled, core the cupcakes to add in the caramel.
- Remove the caramel from the oven, place some into a piping bag. If it is too cold, put it in the microwave for 15 seconds until it is able to pipe. Fill the hole in the cupcakes with caramel. Set aside.
- Once the ganache is room temperature, place it in a stand mixer bowl, with the room temperature butter. Using a paddle attachment, whip the ganache up until it is fluffy and lighter in colour.190 Grams Butter
- Put the whipped ganache into a pipping bag with a tip of your choice. Pipe the icing onto the cupcakes.
- Store the cupcakes into the fridge if your home is warm. Serve and enjoy!
Did you make this recipe?
Lovely. Now let me know how you liked it and how easy it was to bake. Tag @laurabakesglutenfree on Instagram and hashtag it #laurabakesglutenfree.
While I have you here, may I suggest few you try next:
Until next time. Keep following and commenting. Join me on Instagram, where I will be revealing my secret tips and tricks! Yes, that’s right!