I have a love, hate relationship with swiss meringue buttercream. I love the silk texture, the melt in your mouth, the sweet but not too sweet taste. But I hate that if your temperatures are not just right, then it takes more work to get it to become perfect. This is why I have created some tips below on how to make sure your icing is successful! Even if it looks like you messed it up, DO NOT throw it out, it can be brought back to life! This will soon be your favourite icing to eat too!
Making swiss meringue buttercream
I know what you are thinking – I am ready to make it… but my butter is still in the fridge. Honestly, this happens to me every single time! It might be why I love this recipe, because you can always rescue it into a delicious icing. One trick is to get your meringue beating (as it will take a while). Then cut your butter up into cubes, and put it on a plate. I then put the plate over the water bath I was using to cook the egg whites. The hot water will gently melt the butter without making liquid butter. This ‘hack’ is the best thing that I have ever did. Since then, I do not normally have temperature issues, it is a simple thing to do.
Using swiss meringue buttercream
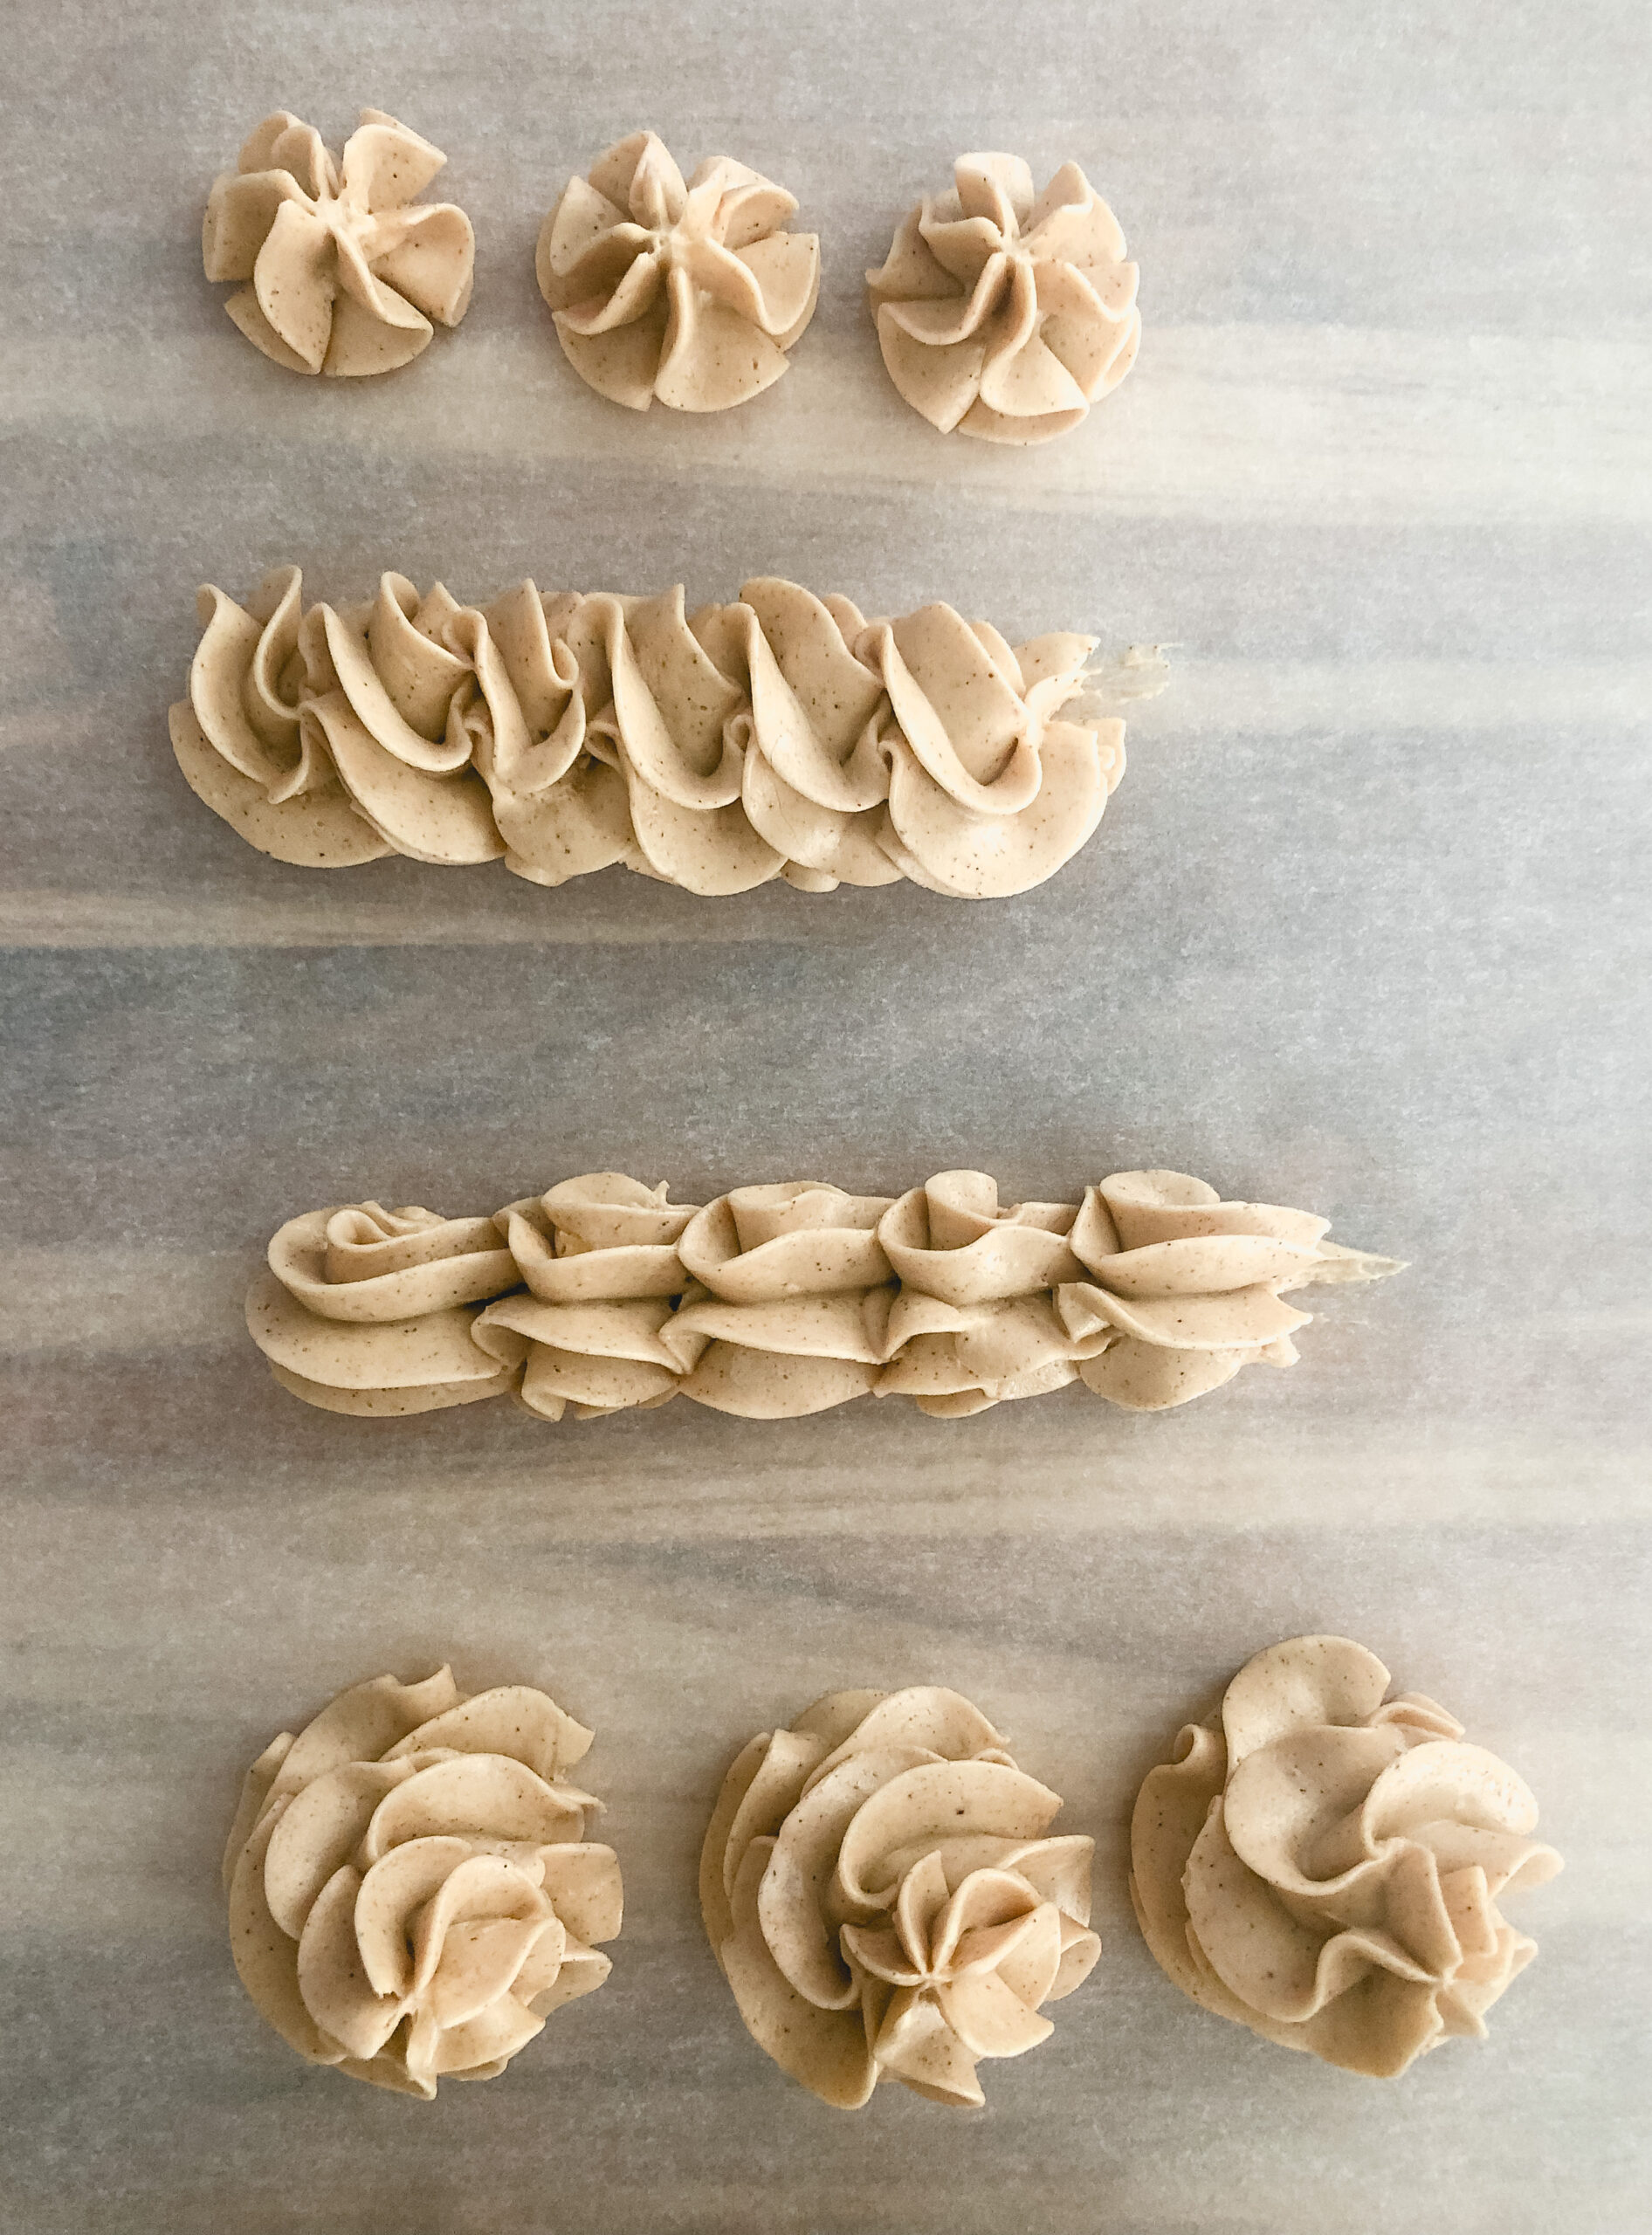
This icing is a dream to work with. It is stable enough to use as icing on cupcakes, or cakes, however it can also be used to fill desserts such as macarons. Here you can see how it stands being piped in different patterns.
If you don’t have piping tips already, these ones are my favourite and a wide variety to choose from.
Problems
Swiss meringue buttercream is known for sometimes being tricky. That is only because if you throw cold butter into the stiff meringue peaks it will throw everything off…. But you can ALWAYS save it, so never throw it out.
If it starts looking soupy or curdled, turn off your mixer. You want to stick your thermometer into the icing to see what the temperature is. You want your icing to be between 69F to 75F.
If the icing is above 75F, take the stand mixer bowl with the icing inside and throw it into the freezer for 15-20 minutes. Once you pull it out of the freezer, beat it on medium speed again and it should come together. If it is still above 75F when you have beat it for 2 minutes, then stick it in the freezer for longer. This just means everything is warmer than it should be. The butter is becoming a mess instead of silky and delicious.
If the temperature is below 69F and looking curdled, it means your butter was colder than it should have been. All you need to do is take out ½ cup, but it into a bowl, and heat it for 30 seconds in the microwave until it melts. Pour this into the icing and beat everything together. This should do enough of the trick to get the texture you are after. If it doesn’t then put the stand mixer bowl over a double broiler and heat it all up until the edges slightly melt. Once that happens you can beat again.
Flavours and colours
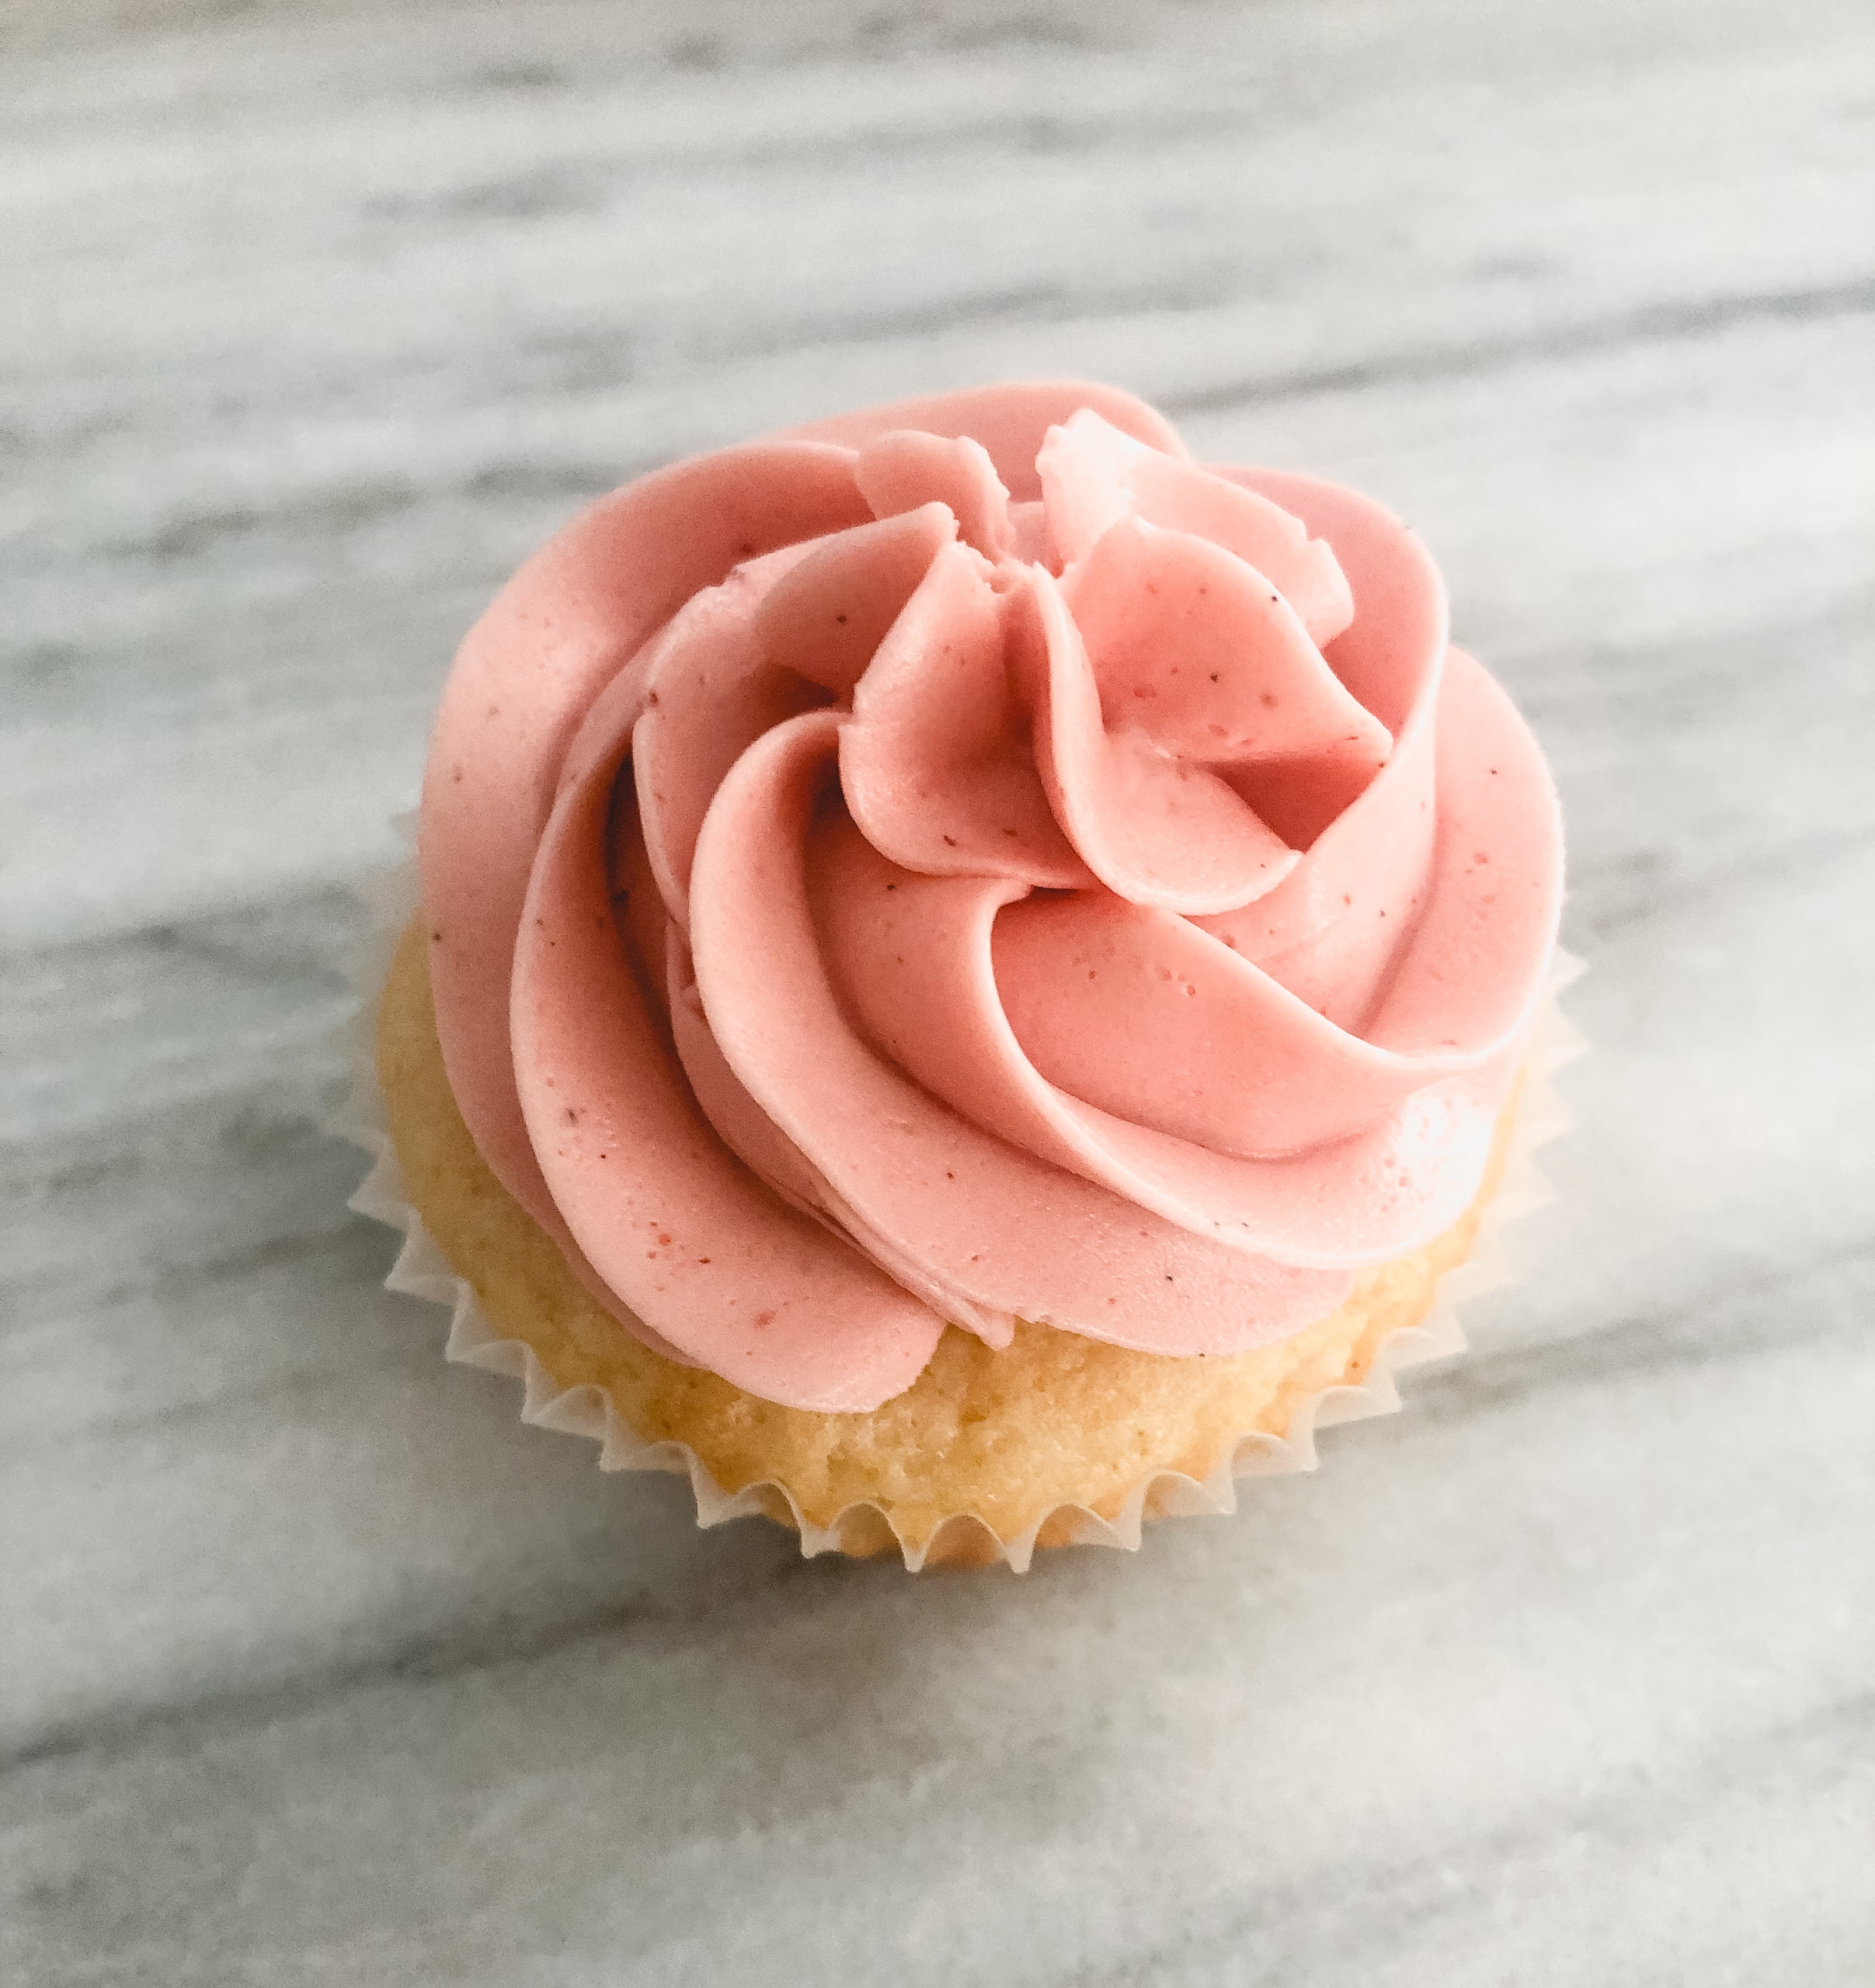
Flavours such as fruit are a great way to amplify your cake or dessert. The pink frosting is flavoured as strawberry. I added jam to a food processor and poured it into the icing once it was fully completed.
Another way to add flavours to the icing is a different method. The brown icing above is using brown sugar instead of regular sugar. I then put in cinnamon to create a brown sugar cinnamon icing. Honestly the options are endless. Let me know which flavour is your favourite in the comments below!
For colouring it, I personally use powdered food colouring. That is mostly because it works better is macarons. I use about 1/4 total of the powdered colour or until I reach the colour I am after.

Storing
This icing is so easy to store. You can store extras in an air tight container and in the fridge for a couple of days. If you have extras and will not use them within a couple of days you can freeze it. I know, it sounds a bit odd to freeze buttercream and have it come back without losing the silky texture, but it does! Here is what I have done:
Pulled my freezer bag of swiss meringue buttercream out of the freezer. I was already making swiss meringue buttercream so I had a pot of hot water. Then I turned the water back on and threw the freezer bag with the buttercream into the water. I let it sit in there until it was half melted. Once it was half melted, I put it into my stand mixer with the paddle attachment. Start it on low to break up the chunks. Then once it is not splashing anymore, crank it to a medium/high speed and watch it come alive. Once it comes back to the right texture, it will taste exactly like when you froze it! SO easy, and worth making a double batch every time!
Swiss meringue buttercream
Equipment
- 1 Double broiler
- 1 Stand Mixer
- 1 Thermometer
Ingredients
- 4 Large Egg White
- 1 ¼ Cups Sugar
- 1 ½ Cups Butter – Softened (cut into cubes)
- 1 Splash vanilla
- Pinch salt
Instructions
- In your stand mixer bowl, set over a saucepan of boiling water. Combine egg whites, pinch of salt and sugar and whisk together until combined. Cook the egg white and sugar combination until the sugar has dissolved and the mixture is at 160 degrees.4 Large Egg White, Pinch salt, 1 1/4 Cups Sugar
- Attach the bowl to the stand mixer with the whisk attachment. Beat the egg whites on a medium speed until you reach a soft peak. This ensures the egg whites are made up of small air bubbles instead of large ones. One you are at soft peak, turn it up to high until you reach stiff peaks. This takes about 10 minutes.
- While this is mixing up, cut your butter into cubes and put on a plate. Place the plate over the double broiler water to soften if it is not at room temperature.
- Switch to the paddle attachment. With the mixer on medium speed, add butter in small cubes at a home. Beat well between chunks of butter. Once all the butter is incorporated turn it up to a medium/high speed until it is smooth around 5 minutes.1 1/2 Cups Butter – Softened
- Beat in vanilla (I prefer to use vanilla bean in this as it makes the taste even more amazing)1 Splash vanilla
- You are ready to use!
Notes
Did you make this recipe?
Lovely. Now let me know how you liked it and how easy it was to bake. Tag @laurabakesglutenfree on Instagram and hashtag it #laurabakesglutenfree.
While I have you here, may I suggest few you try next:
Until next time. Keep following and commenting. Join me on Instagram, where I will be revealing my secret tips and tricks! Yes, that’s right!