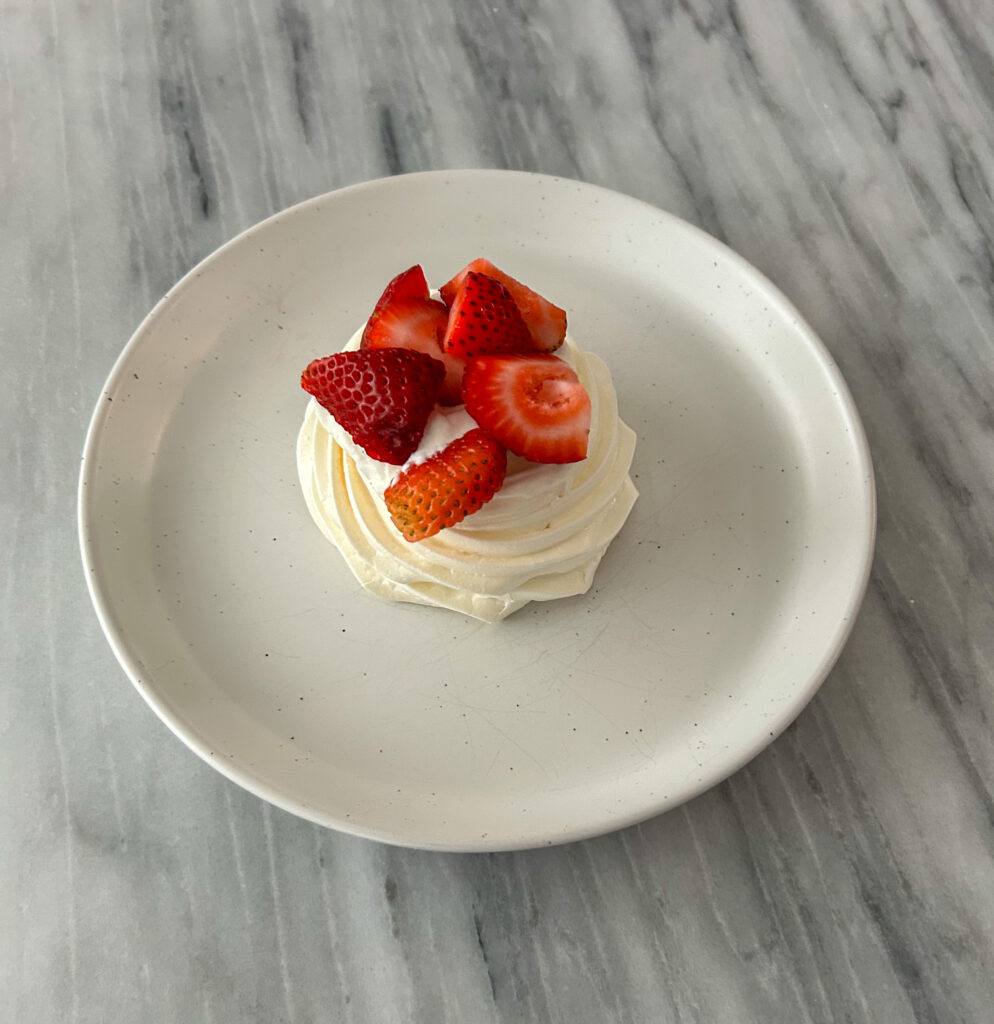
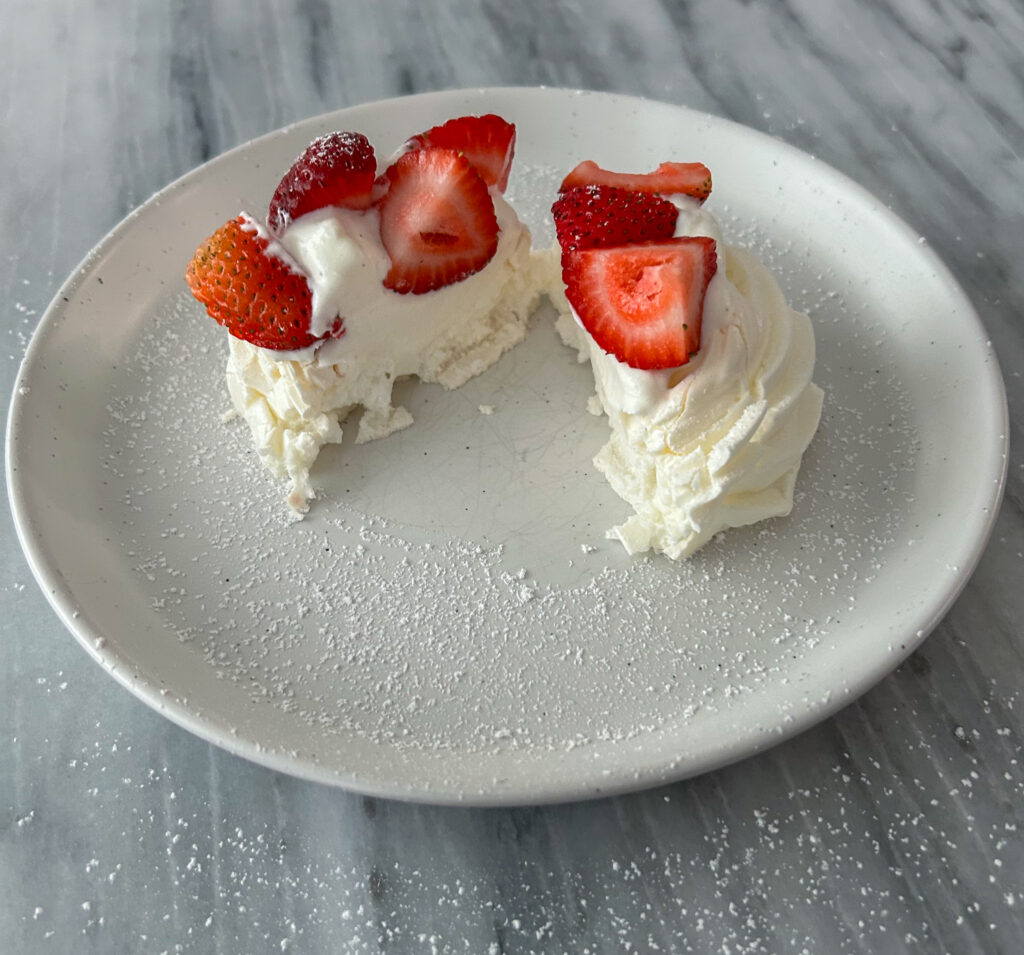
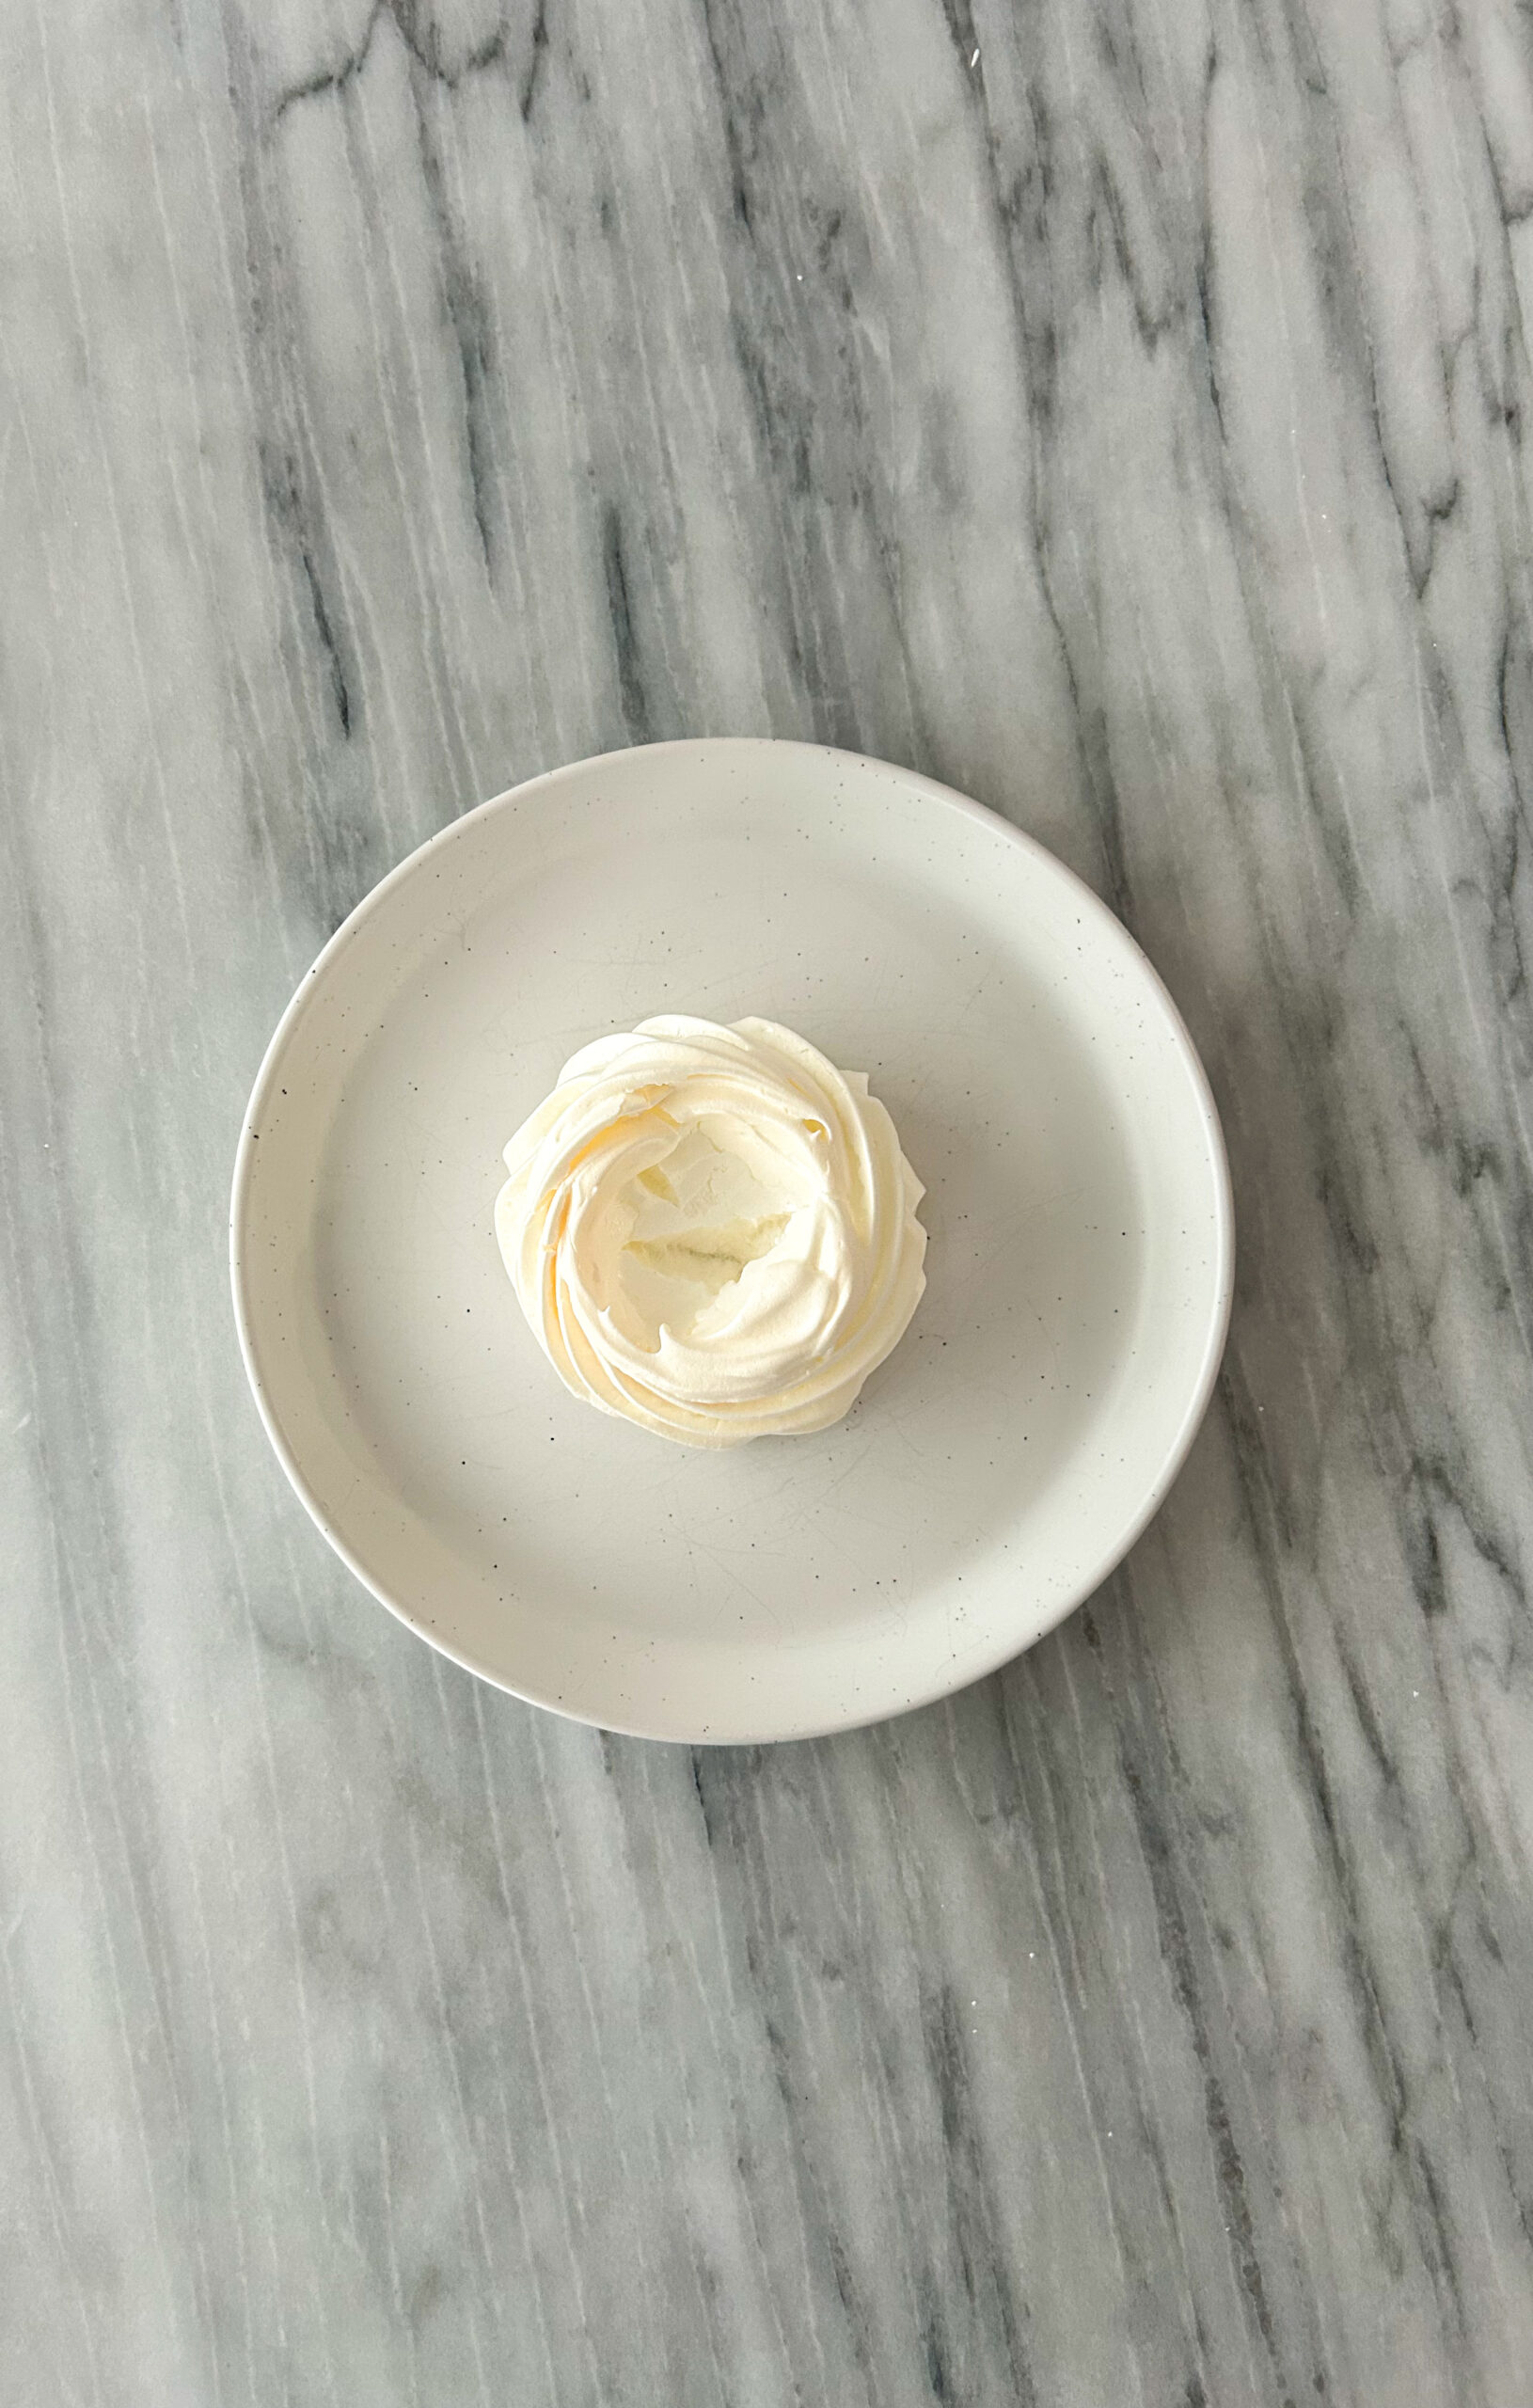
There’s something undeniably special about a dessert that looks impressive but is secretly simple—and that’s exactly what these mini pavlovas deliver. With crisp, delicate meringue shells and a soft, marshmallowy centre, they’re the perfect base for whipped cream and whatever fresh fruit you have on hand. Think of them as a blank canvas for seasonal toppings, from juicy summer berries to citrus slices or even tropical fruit.
Best of all, pavlova is naturally gluten-free, making it a beautiful and inclusive dessert for gatherings. Whether you’re planning a dinner party or just want to treat yourself, these mini versions are easy to portion, easy to prep ahead, and always a showstopper. You’ll only need a few pantry staples, and the payoff is a dessert that feels both light and luxurious.
What is a pavlova?
A pavlova is a light and airy dessert made from whipped egg whites and sugar, baked until the outside is crisp and the inside stays soft and marshmallowy. It’s typically topped with whipped cream and fresh fruit, making it both elegant and refreshing.
Named after the Russian ballerina Anna Pavlova, the dessert originated in either Australia or New Zealand (both countries claim it!) and has become a staple at celebrations and summer gatherings. While traditional pavlova is made as one large round, mini pavlovas are individual-sized and just as impressive—plus, they’re easier to serve and customize.
how is it different from a meringue nest?
While pavlovas and meringue nests might look similar, there are a few key differences—mainly in texture and baking method:
Pavlova vs. Meringue Nest
1. Texture:
- Pavlova has a crisp outer shell but a soft, marshmallow-like centre. That chewy, pillowy inside is its signature.
- Meringue nests are typically baked until they are dry and crisp all the way through, like a crunchy cookie.
2. Ingredients & Method:
- Both use egg whites and sugar, but pavlova recipes often include cornstarch and a bit of vinegar or lemon juice to help create that soft centre.
- Meringue nests usually skip those ingredients and are baked at a low temperature for longer to dry them out completely.
3. Eating Experience:
- Pavlova feels light and creamy when eaten—great for pairing with whipped cream and juicy fruit.
- Meringue nests are more like a crisp shell that shatters when you bite into them, still delicious but with a different mouthfeel.
So, while they’re close cousins, pavlova is all about that soft centre, while meringue nests aim for crunch from top to bottom.
Can you make one big one?
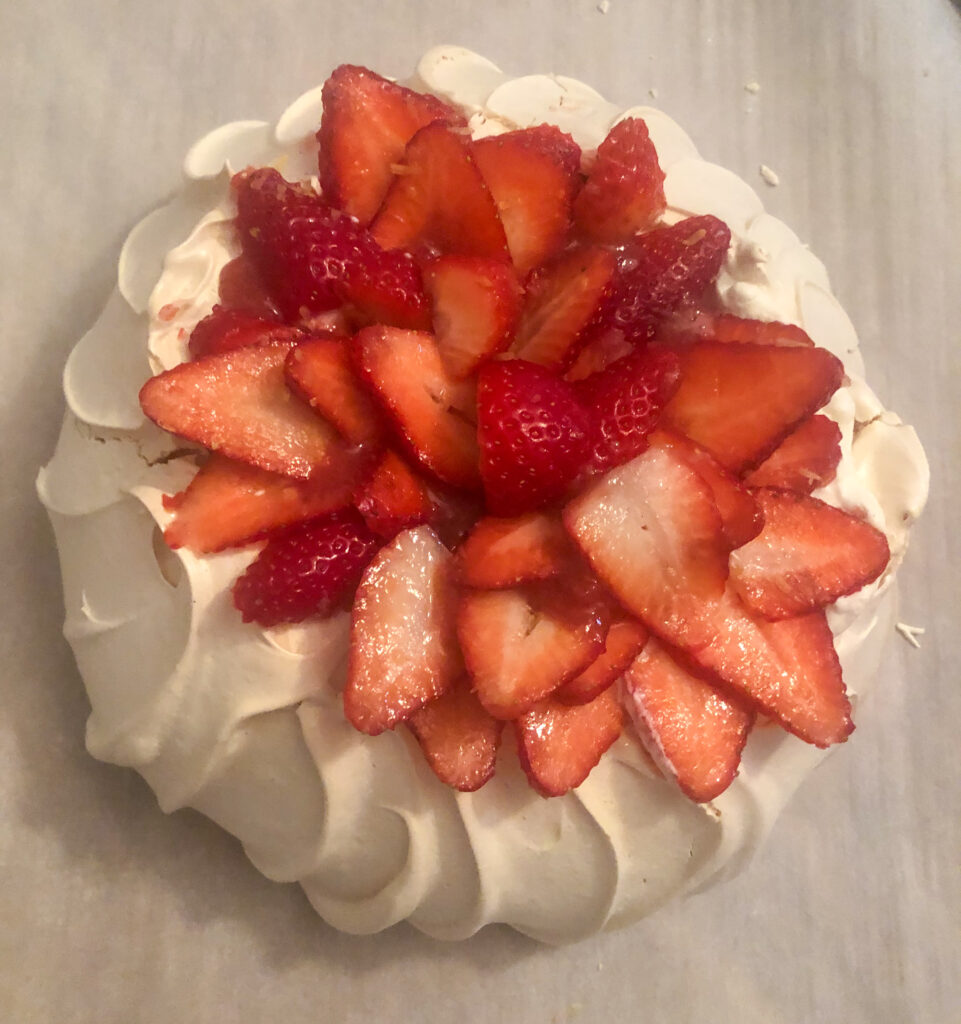
A big pavlova is perfect for celebrations and makes a beautiful centrepiece, while mini ones are great for individual servings. Both versions taste the same—crispy outside, soft and marshmallowy inside—so it’s just a matter of presentation and preference! You can pipe it into a big circle, but it will need longer in the oven, I would check it at 1.5 hours and then increase the time to 1.75 hours total.
I did a large version for my husband and I when we were having an at-home date night.
ingredients
- Egg Whites: I like to use fresh ones instead of the ones from a carton. I find they whip up nicer.
- Sugar
- Vanilla Bean Paste Or Vanilla Bean Extract
- Salt
- Vinegar or Lemon Juice
- Whipping Cream
- Icing Sugar
- Fruit: Whatever you have on hand. I typically go for berries as I have them on hand: strawberries, raspberries and blueberries are delicious in this.
Tools
Storing
Storing pavlova takes a bit of care to keep its delicate texture intact. Here’s how to do it properly:
Before Topping (Best Option)
If you haven’t added whipped cream or fruit yet:
- Cool completely, then store the pavlova in an airtight container at room temperature.
- Keep it in a cool, dry place (not the fridge—humidity causes the meringue to soften or weep).
- Shelf life: Up to 2 days, though it’s best enjoyed within 24 hours for maximum crispness.
After Topping (Cream/Fruit Added)
Once the pavlova is topped with whipped cream and fruit:
- Store in the fridge, uncovered or very loosely covered (to avoid trapping moisture).
- The meringue will begin to soften from the toppings, but it will still taste delicious.
- Shelf life: Best eaten within 4–6 hours, but can last up to 1 day—expect a softer texture.
Pro tip: If making ahead, bake the pavlova the day before, store it plain at room temp, and add toppings just before serving. This keeps that lovely crisp shell and marshmallowy centre intact.

Mini Pavlova
Ingredients
Pavlova
- 8 Egg White
- 250 Grams Sugar
- 7 Grams Corn Starch
- 5 Grams Vinegar
Whipped Cream Topping
- 260 Grams Whipping Cream (35%)
- 3 Grams Vanilla
- 20 Grams Icing Sugar
- 200-250 Grams Fruit to Top Pavlovas – Raspberries, Blueberries, Strawberries, etc
Instructions
Pavlovas
- Preheat the oven to 325F
- In a stand mixer, add in the egg whites, cornstarch and vinegar. Mix in a low/medium speed until frothy.8 Egg White, 7 Grams Corn Starch, 5 Grams Vinegar
- Once it is frothy, sprinkle in the sugar one spoonful at a time. Make sure you give some time in between for the sugar to incorporate into the egg white mixture.250 Grams Sugar
- Once all the sugar is added, turn up the mixer to 8 until it is a medium peak. It is not stiff, but it is almost there.
- Prep a piping bag with a large star. Add in all the egg mixture.
- On prepared parchment paper on baking trays, pipe 6 circles per tray. I do it like you are piping a cupcake, and then at the end take a spoon and make an indent in the top so you can add in whipped cream and fruit. If you do not have a piping bag, you can use a spoon to mound it.
- Place in the oven for 1.5 hours. Once they are baked, turn off the oven and leave them inside until they cool about 2-4 hours, or even overnight. This will dry them out so they do not crack. If you pull them out early, they will just crack a little bit, but will still be delicious!
Whipped Cream
- In a glass bowl, add in whipping cream, vanilla and icing sugar.260 Grams Whipping Cream (35%), 3 Grams Vanilla, 20 Grams Icing Sugar
- Using a whisk, whisk until it is stiffed and holds its shape. Spoon some of the whipped cream ontop of the pavlovas.
- Next top them with whatever fruit you would like. Enjoy!200-250 Grams Fruit to Top Pavlovas – Raspberries, Blueberries, Strawberries, etc
Did you make this recipe?
Lovely. Now let me know how you liked it and how easy it was to bake. Tag @laurabakesglutenfree on Instagram and hashtag it #laurabakesglutenfree.
While I have you here, may I suggest few you try next:
Until next time. Keep following and commenting. Join me on Instagram, where I will be revealing my secret tips and tricks! Yes, that’s right!