


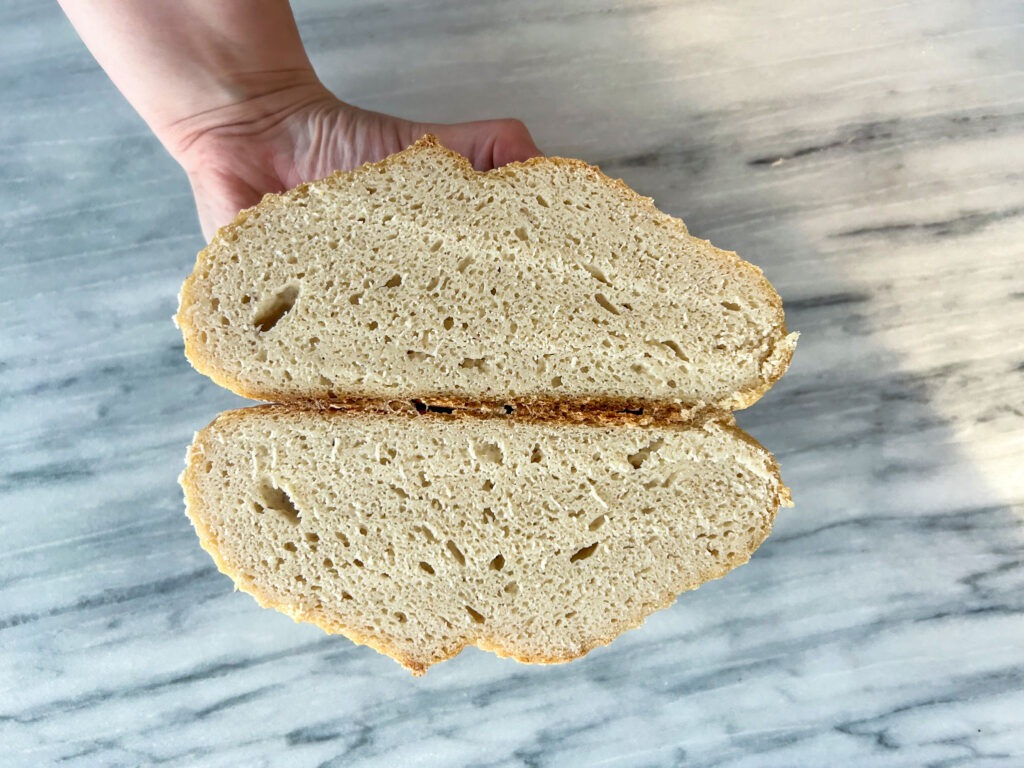
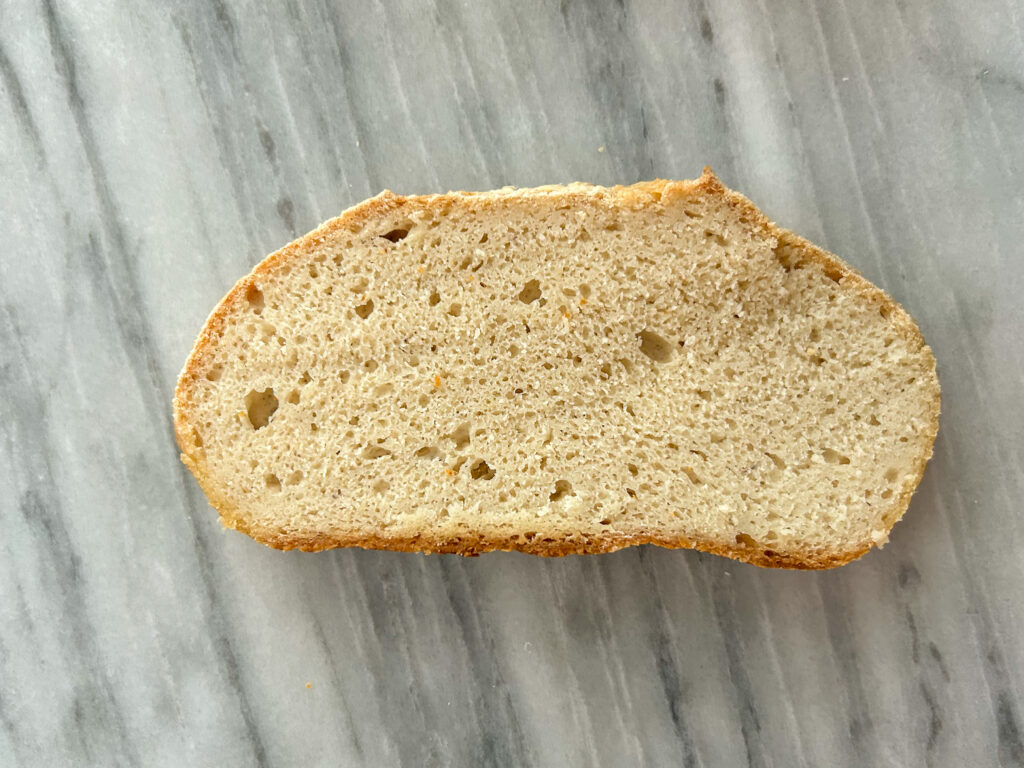
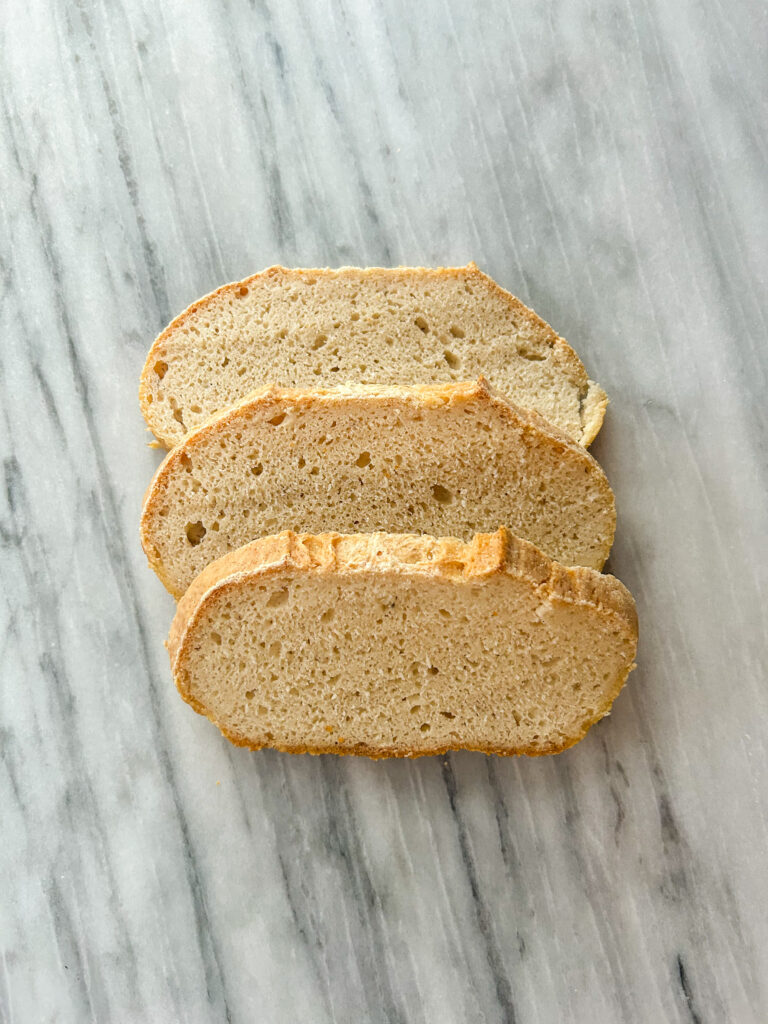
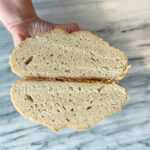
Gluten free sourdough bread is a delicious bread that offers a unique tangy flavour and a satisfying texture. Made from a gluten free sourdough starter, this bread captures the essence of traditional sourdough while being completely gluten free. With a crispy crust and a soft, chewy interior, it’s perfect for sandwiches, toast, or simply enjoyed on its own. Plus, the natural fermentation process enhances its flavour and makes it easier to digest. Whether you’re new to gluten free baking or a seasoned pro, this sourdough bread will quickly become a staple in your kitchen!

Starter
You will want to have a developed gluten free sourdough starter first and foremost before you make this bread. Here is my recipe for it.
The timeline of this recipe is important so the proofing part of this recipe happens while you are sleeping. I feed my starter in the morning when I wake up. I leave it on the counter for about 8 hours to rise.
Ingredients
There are a couple ingredients that you will need to make this loaf of gluten free bread.
- Gluten Free Sourdough Starter
- Brown Rice Flour
- Millet Flour
- Tapioca Starch
- Potato Starch
- Salt
- Water
- Psyllium Husk
- Olive Oil
How to make gluten free sourdough
Once you have an active starter, you will use some of the starter in the “poolish” or what is also called as the pre-ferment. You will leave that pre-ferment for 3-6 hours until it is puffy, airy and look like your starter does at the peak.
Once that happens, you will mix up the bread together on a stand mixer (recipe below). I do not kneed the dough because gluten free bread does not have any gluten to develop, so you can take it straight from the bowl of the stand mixer and placed into the banneton to proof the bread.
Lately I have been using a banneton to proof my bread, with the cotton liner or without depending on the look I am going for. I have also proofed this bread in a glass bowl that was the shape I was looking for. I cover the banneton or bowl with plastic wrap and put into the fridge.
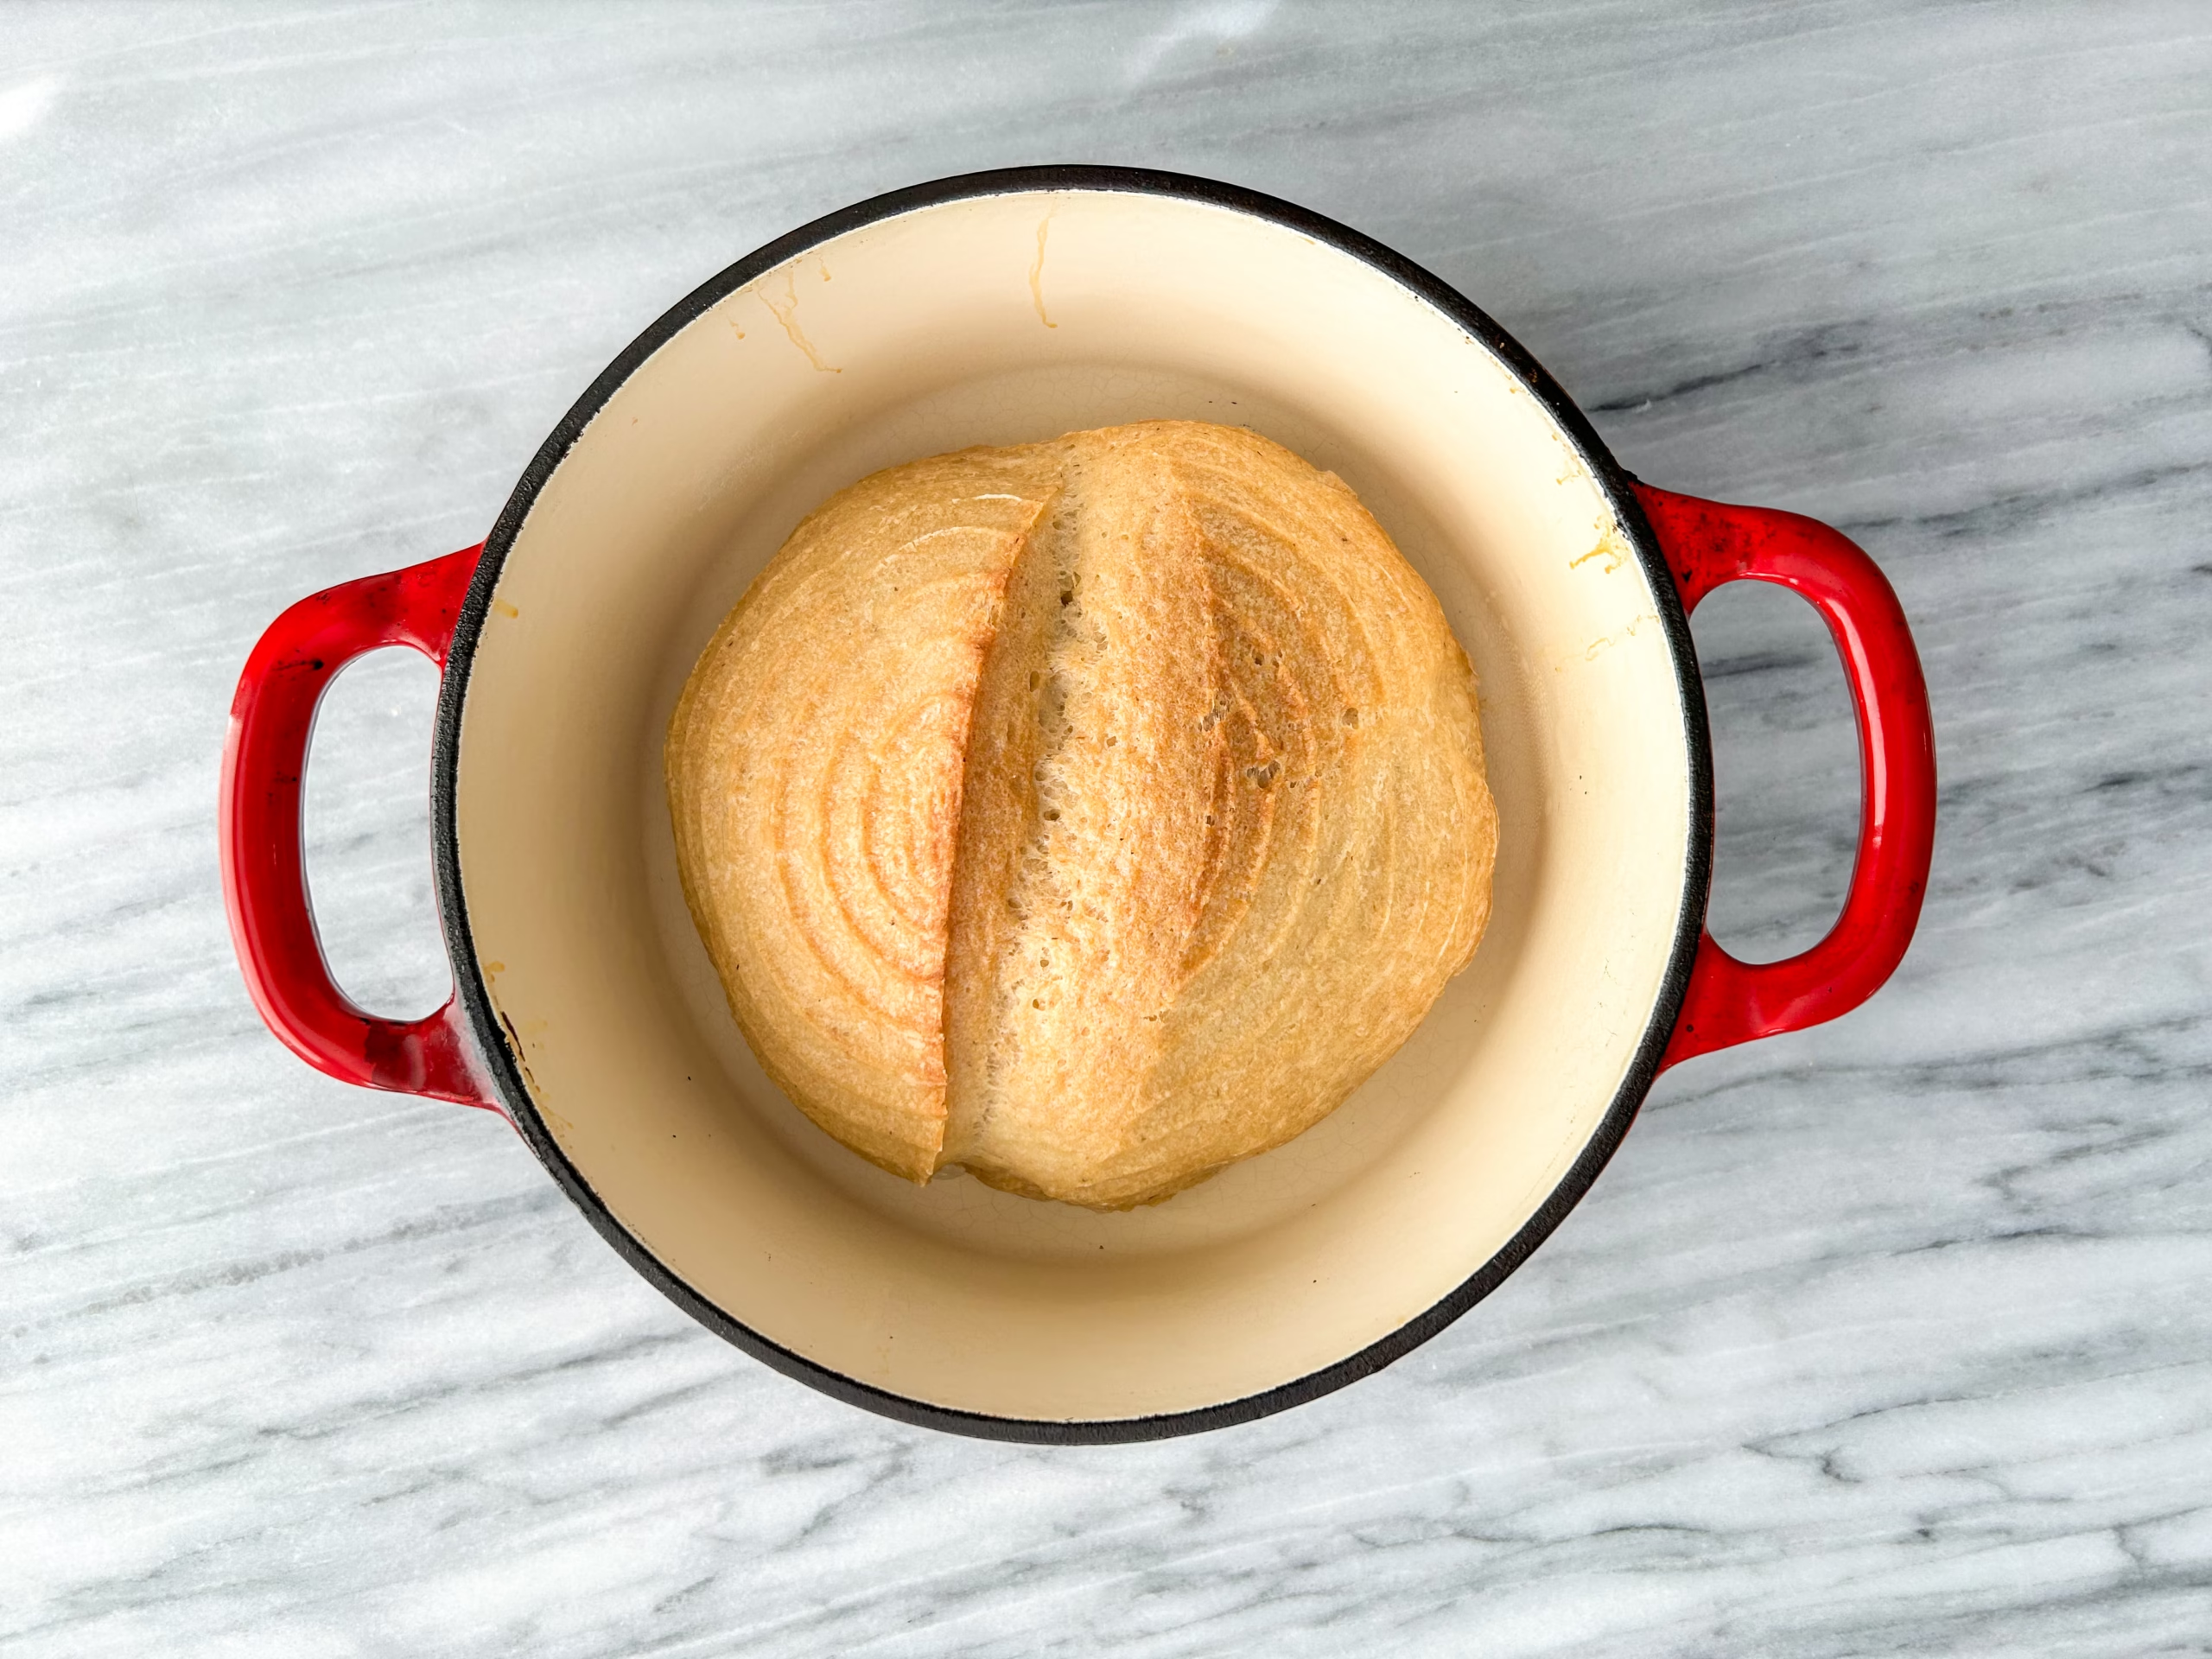
The bread will proof in the fridge for 8-10 hours while you are sleeping. Once you wake up, you will need to bake the bread. I generally bake it in a Dutch oven. If you are doing that, you will need to place the Dutch oven in the oven and turn on the oven to heat it up. I have also baked this bread on a cast iron skillet. You will also need to put that in the oven to pre-heat while the oven heats.
baking gluten free sourdough bread
Once the oven heats, you will carefully flip the bread out of the banneton and onto 2 pieces of parchment paper. Once you do that, you will score the bread in whatever patten you are looking for, and then place it into the Dutch oven. I place 2-3 ice cubes between the parchment paper and the Dutch oven and place the lid on top. If you are not using a Dutch oven, you will put a container of water in a dish on the bottom rack of the oven and place the scored bread onto the cast iron pan.
After 45 minutes, you will remove the water or take the lid off the Dutch oven and continue baking. Once the bread is finished baking, I stick my thermometer into the bread to see the temperature. The temperature will depend on what sea level you are at. A great way to figure it out, is if you boiled a pot of water, whatever the temperature of the boil is, that is the temperature the inside of your bread should be. Mine is 208F.
Once you hit the temperature, I leave it in for 5-10 more minutes to make sure it is browned, and then I remove it from the oven. I leave it in the Dutch oven for 10-15 minutes and then I place it on a cooling rack.
Enjoy the bread once it is fully cooled to avoid a gummy loaf.
Storing
This bread is a labour of love, and definitely worth every bite. If I do not eat the entire loaf that day, I seal it up in a ziplock bag.
The second day, I can eat the bread right off the loaf, or toast it with some butter. If you are going to freeze the bread, I would slice it up and then freeze it to make it easy to toast up later.
Gluten Free Sourdough Bread
Ingredients
Poolish also called Pre-Ferment
- 122 Grams Gluten free sourdough starter
- 110 Grams Water
- 40 Grams Brown Rice Flour
- 40 Grams White Rice Flour
Dough
- 105 Grams Brown Rice Flour
- 60 Grams Millet Flour
- 60 Grams Tapioca Flour
- 60 Grams Potato Starch
- 8 Grams Salt
- 125 Grams Water
- 20 Grams Psyllium Husk
- 150 Grams Water
- 10 Grams Olive Oil
Instructions
Poolish also called Pre-Ferment
- Mix together the gluten free sourdough starter, water, brown rice flour and white rice flour.122 Grams Gluten free sourdough starter, 110 Grams Water, 40 Grams Brown Rice Flour, 40 Grams White Rice Flour
- Cover the bowl with plastic wrap. Place the bowl in a warm location for 3-6 hours. It depends on when it is bubbling and how strong of a sourdough flavour you would like. My kitchen was cold, so I placed mine in a COLD oven with the light on.
- Once you are ready to go onto the next step, in a bowl add in psyllium husk and water and set aside until it forms a gel.125 Grams Water, 20 Grams Psyllium Husk
- In a stand mixer bowl, add in the dry ingredients and mix together until combined.105 Grams Brown Rice Flour, 60 Grams Millet Flour, 60 Grams Tapioca Flour, 60 Grams Potato Starch, 8 Grams Salt
- Add in olive oil into the psyllium husk gel and add it to the stand mixer bowl.10 Grams Olive Oil
- Add in the poolish (pre-ferment) to the stand mixer bowl with the paddle attachment.
- Mix on low until it is all combined. Slowly add in the water until the dough comes together and does not stick to the sides of the bowl. This amount of water work for me, but I would slowly add it in as you might not need all the water.150 Grams Water
- Prepare a bowl, or a bread proofing bowl with or without the cotton liner. Dust it with rice flour lightly. Remove the dough from the mixer bowl, and add it to the bowl or bread proofing bowl. Cover the bowl with plastic wrap. Place it in the fridge overnight.
Baking Bread
- In the morning, turn your oven to 425F. While it preheats add your Dutch oven to the oven to heat up as well.
- Pull your bread from the fridge and place it on the countertop while the oven preheats.
- Once the oven is preheated, take 2 pieces of parchment paper, slightly larger than the bread and place them on top of the bread. Carefully flip the bread onto the parchment paper. Score the bread and make any design you would like.
- Place the bread on the parchment paper into your Dutch oven. Put 2-3 ice cubes between the parchment paper and the Dutch oven. Put the lid on the Dutch oven.
- Bake for 45 minutes.
- Remove the lid from the Dutch oven. Continue baking for 30 minutes or until it is cooked. The internal temperature should be your boiling point based on altitude. Mine is 208F when it is completed. If the thermometer comes out with sticky dough on it, it is not completed and should be baked some more.
- Once baked, remove the parchment paper with the bread on it from the Dutch oven. Place it on a wire rack to cool. Cut into the bread once it is fully cooled. Enjoy!
Did you make this recipe?
Lovely. Now let me know how you liked it and how easy it was to bake. Tag @laurabakesglutenfree on Instagram and hashtag it #laurabakesglutenfree.
While I have you here, may I suggest few you try next:
Until next time. Keep following and commenting. Join me on Instagram, where I will be revealing my secret tips and tricks! Yes, that’s right!

1 Comment
Pingback: Top Gluten Free Flour Blends in Canada (Tried & Tested) - Laura Bakes Gluten Free