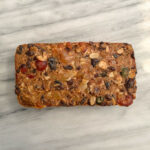
These Gluten Free Madeleines are the perfect little treat when you want something elegant but incredibly simple to make. They’re soft, buttery, lightly sweet, and bake into that classic scalloped shell shape that feels instantly fancy — even though they come together with basic pantry ingredients.
To make them extra special, I dip the cooled madeleines in rich dark chocolate and finish them with a sprinkle of crushed hazelnuts. The combination is absolutely dreamy: the tender sponge, the snap of the chocolate, and the nutty crunch on top. They look like something from a bakery window, but they’re surprisingly easy to whip up at home.
These gluten free madeleines are perfect for holiday gifting, serving with coffee, or adding to a dessert board. And trust me — once you start dipping them in chocolate, you’ll want to try all kinds of variations!

Flavours you can try
Once you fall in love with homemade gluten free madeleines, the possibilities are endless. You could make a classic vanilla, eggnog, coffee, chocolate chip, lemon, or almond. I have also seen people make matcha ones, however matcha isn’t my favourite so I would rather some of the other ones.
ingredients
- Eggs
- Sugar
- Vanilla
- Gluten Free 1-1 Flour
- Baking Powder
- Salt
- Melted Butter
- Milk
- Cocoa Powder
Tools
- Madeline pan
Storing

These chocolately, gluten free Madeline’s are best eaten the day they are made. They are fresh, tender and technically classified as a cookie … which means eating multiple is approved.
If you are going to store them, in an airtight container on the counter for a couple of days is fine.

Gluten Free Chocolate Madelines
Ingredients
- 2 Eggs
- 100 Grams Sugar
- 3 Grams Vanilla
- 95 Grams Bob’s Red Mill 1-1 Gluten Free Flour or Adent Mills Gluten Free Flour
- 22 Grams Cocoa Powder
- 1 Gram Salt
- 113 Grams Butter – melted
- 2 Grams Baking Powder
- 30 Grams Milk
- Dark Chocolate (For Dipping)
- Hazelnuts (For Decorating)
Instructions
- In a stand mixer with the whisk attachment, add in the eggs, and sugar. Whisk them until they have come together and then turn up the speed to medium/high until it is at ribbon stage. This is when it falls off the whisk in a complete ribbon, expanded in size and is very pale.2 Eggs, 100 Grams Sugar
- Whisk in the vanilla.3 Grams Vanilla
- Fold in the flour, baking powder, salt, cocoa powder until just combined.95 Grams Bob’s Red Mill 1-1 Gluten Free Flour or Adent Mills Gluten Free Flour, 22 Grams Cocoa Powder, 1 Gram Salt, 2 Grams Baking Powder
- Add in the melted butter and milk and fold gently until just combined.113 Grams Butter – melted, 30 Grams Milk
- Cover the bowl, and put it into the fridge for at least 2 hours until fully chilled. You can also prep this the day before baking.
- When you are ready to bake preheat the over to 350F.
- Put the Madeline pan into the fridge to get it cold.
- When the oven is preheated, brush the inside of the cold Madeline pan with melted butter. Then scope about a tablespoon amount into each Madeline spot. Place the pan on a larger baking pan to make it easy to remove from the oven later.
- Bake for 10 minutes. Remove it from the oven. Allow them to sit in the pan for 1-2 minutes. Then flip them onto a parchment covered pan. I do this so they do not leave marks on the Madeline’s.
- Once they are fully cooled, melt dark chocolate in the microwave. Dip the Madeline into the chocolate and place it on a parchment lined tray. Sprinkle on it crushed hazelnuts. Enjoy!Dark Chocolate, Hazelnuts
Did you make this recipe?
Lovely. Now let me know how you liked it and how easy it was to bake. Tag @laurabakesglutenfree on Instagram and hashtag it #laurabakesglutenfree.
While I have you here, may I suggest few you try next:
Until next time. Keep following and commenting. Join me on Instagram, where I will be revealing my secret tips and tricks! Yes, that’s right!