

These gluten free perogies are a game-changer! With a soft, doughy exterior and a savoury filling, they deliver all the comfort and flavour of traditional perogies, without the gluten. Perfect for a cozy dinner or a special treat!
After several failed attempts with gluten free grocery store perogies that either fell apart or turned to mush, I knew it was time to create my own recipe. These gluten free perogies hold together perfectly and taste just like the regular ones—delicious and satisfying!
Gluten free perogies
These gluten free perogies can be filled with a variety of delicious fillings. My go-to is a classic combination of sour cream, garlic, and cheddar cheese, which creates a rich, creamy filling that’s hard to resist!
Ingredients
These ingredients use the most tender and delicious perogie.
- Sour Cream
- Milk
- Egg
- Oil
- Brown Rice Flour
- Corn Starch
- Tapioca Starch
- Potato Starch
- White Rice Flour
- Xantham Gum
- Salt
- Your Favourite Perogie Filling
cooking
To cook gluten free perogies my way:
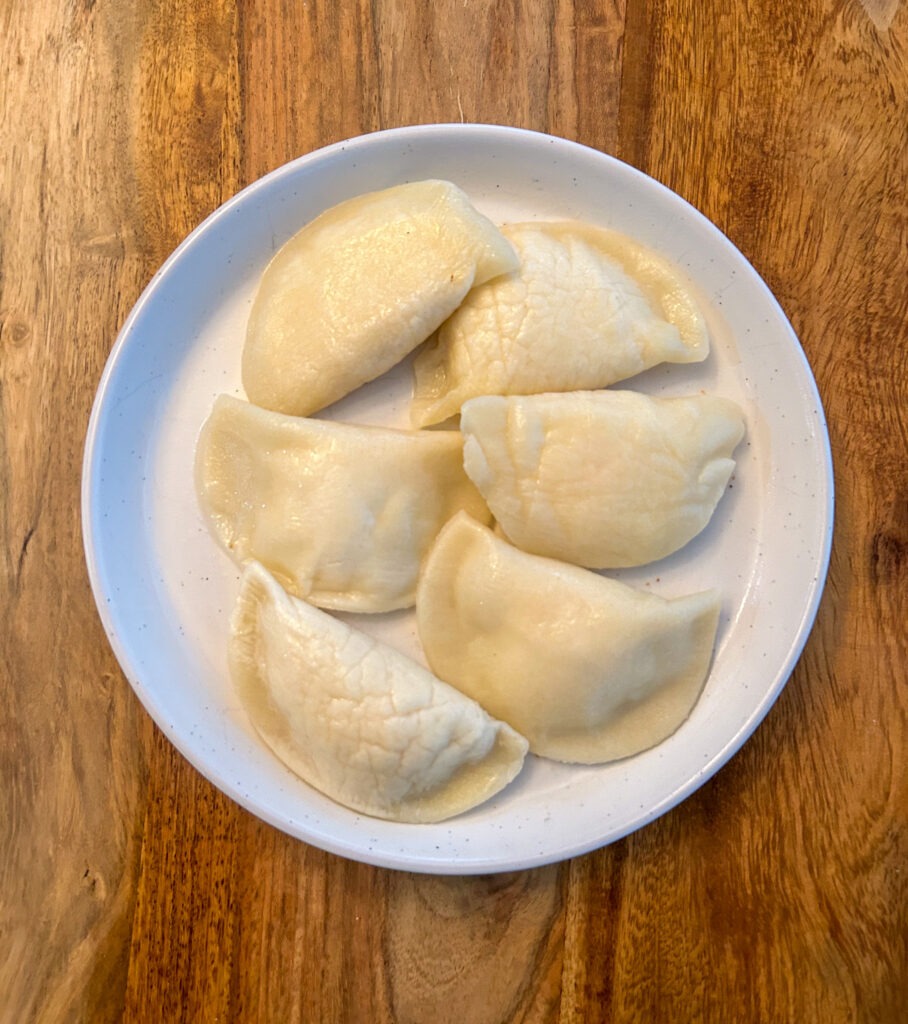
- Boil: Bring a large pot of salted water to a gentle boil. Add the perogies and cook for 3-5 minutes or until they float to the top. Once that is done, drain and set aside.
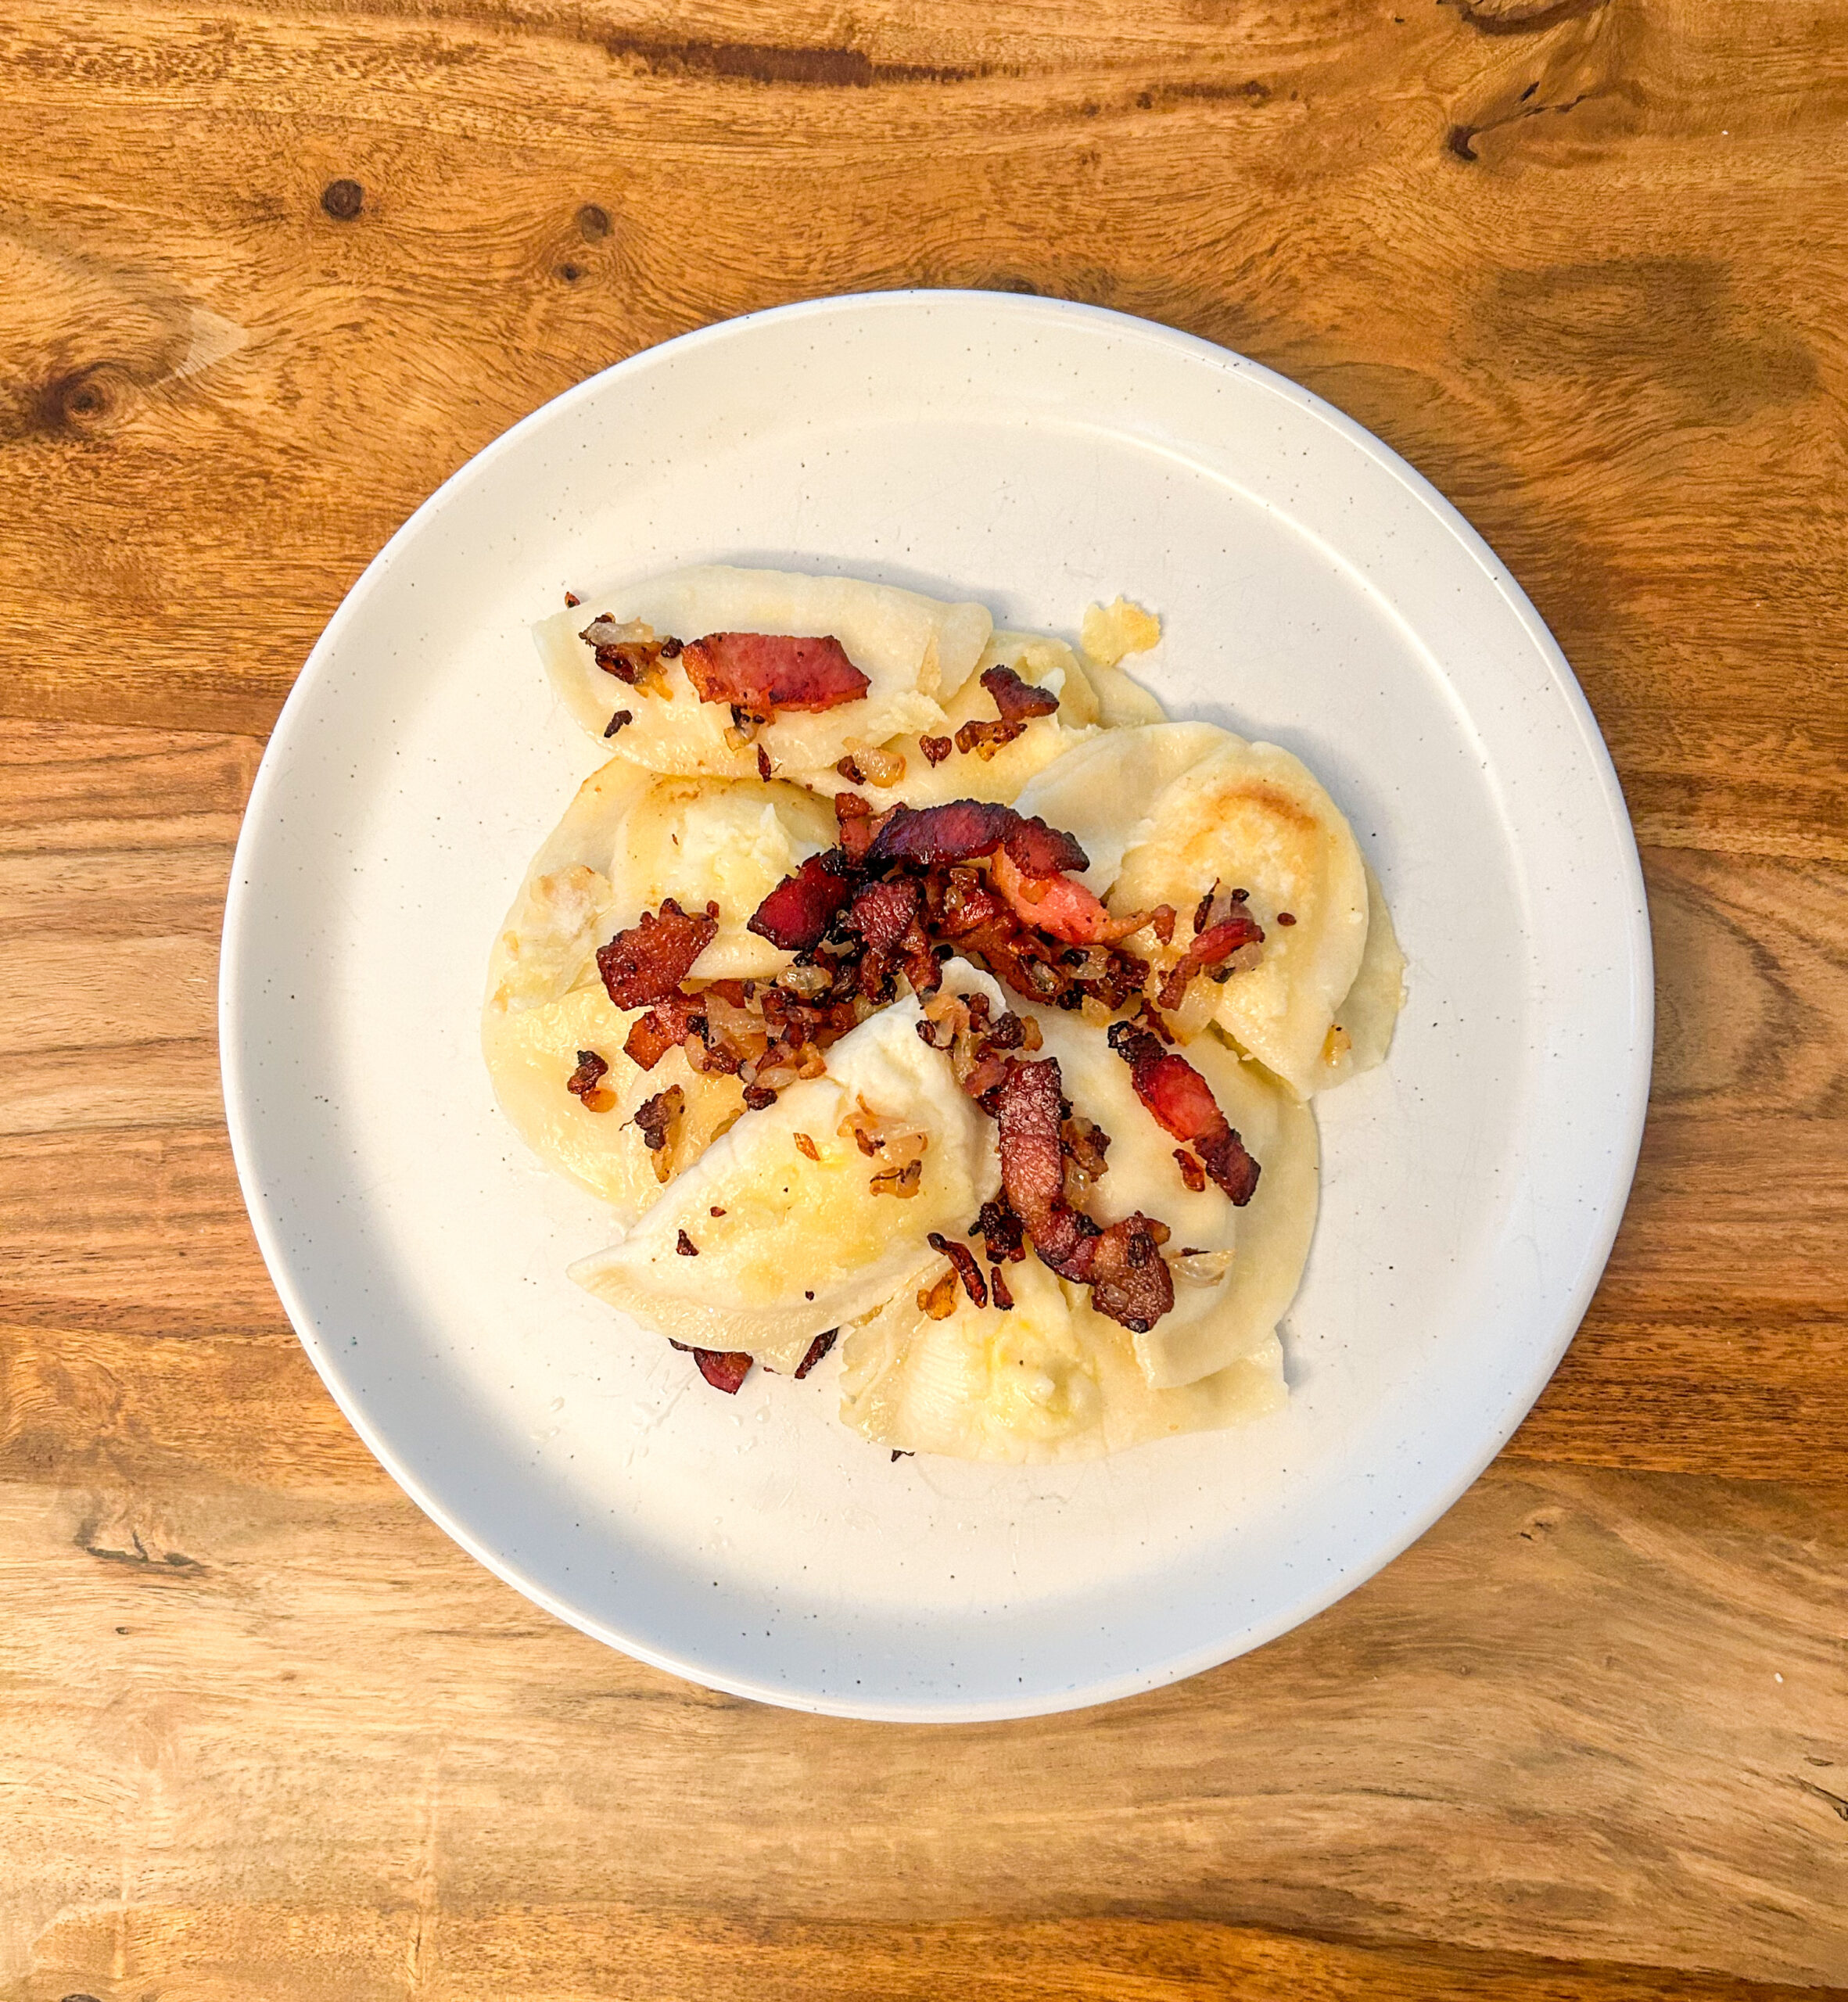
- Pan-fry: In a pan, cook bacon until crispy. Remove and set aside, leaving some bacon grease in the pan. Add sliced onions and sauté until soft and golden. Add the boiled perogies to the pan and fry for 2-3 minutes per side until golden and crispy. Crumble the bacon back in.
- Serve: Top with the crispy bacon, onions, and your favourite extras like sour cream!
freezing
For easy storage, freeze the gluten free perogies individually on a baking sheet as you make them. Once they’re frozen, transfer them to a freezer-safe ziplock bag. This method prevents them from sticking together, and you can conveniently boil them straight from frozen whenever you’re ready to enjoy!

Gluten Free Perogies
Ingredients
Perogie Wrapper
- 80 Grams Sour Cream
- 65 Grams Milk
- 1 Egg
- 9 Grams Oil
- 75 Grams Brown Rice Flour
- 34 Grams Corn Starch
- 30 Grams Tapioca Starch
- 25 Grams Potato Starch
- 24 Grams White Rice Flour
- 3 Grams Xantham Gum
- 3 Grams Salt
Perogie Filling
- 4 Potatoes
- 115 Grams Butter
- 62 Grams Milk
- Garlic
- 200 Grams Shredded Cheddar Cheese
Instructions
Perogie Filling
- Peel the skins off of the potatoes. Cube them and all them into a large pot of water.4 Potatoes
- Once the potatoes are cooked, drain them in a strainer and put them back into the pot.
- Using a food processor, add in the hot potatoes, milk, garlic, butter and cheese. Blend it together until it is smooth and not lumpy.115 Grams Butter, 62 Grams Milk, Garlic, 200 Grams Shredded Cheddar Cheese
- Put the perogie filling into a bowl and cover it. Place the bowl in the fridge to cool.
Perogie Wrapper
- In the food processor/blender, blend together sour cream, milk, egg, oil and salt together.80 Grams Sour Cream, 65 Grams Milk, 1 Egg, 9 Grams Oil, 3 Grams Salt
- In a stand mixer bowl, add in all the dry ingredients. Stir to combine.75 Grams Brown Rice Flour, 34 Grams Corn Starch, 30 Grams Tapioca Starch, 25 Grams Potato Starch, 24 Grams White Rice Flour, 3 Grams Xantham Gum
- With the paddle attachment, add half of the liquid into the dry ingredients and combine. Slowly add in little by little of the liquid. If there is still dry ingredients at the bottom of the bowl, add a little bit more liquid and mix together. You might not need all of the liquid. The dough will be slightly sticky but not wet.
- Once the dough is ready, you are ready to start making perogies. Remove the perogie filling from the fridge.
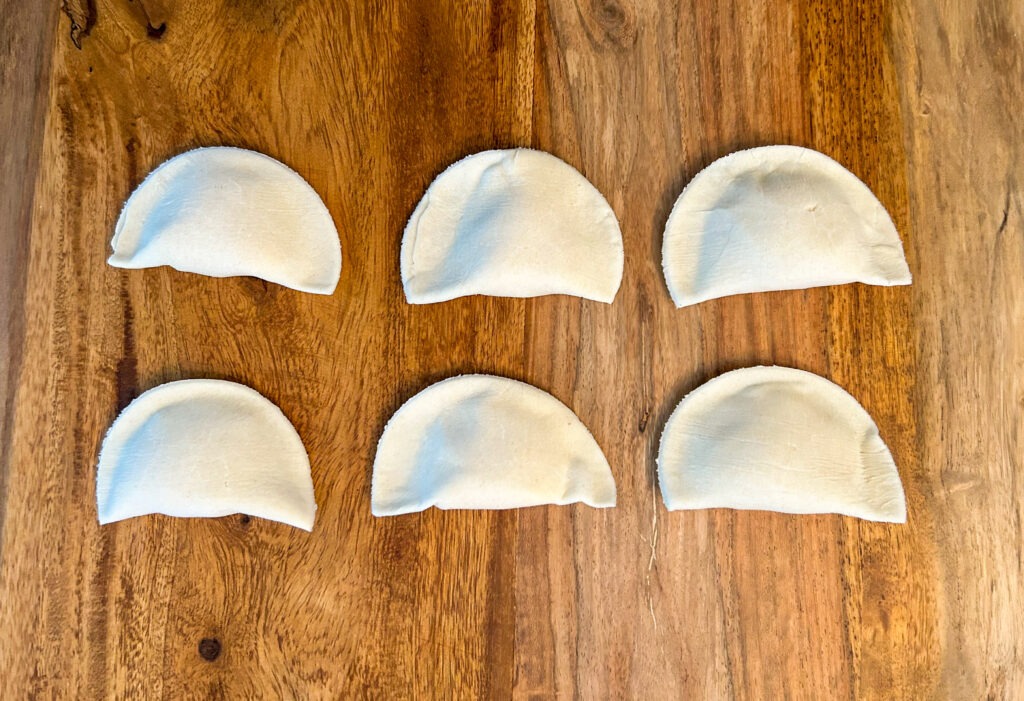
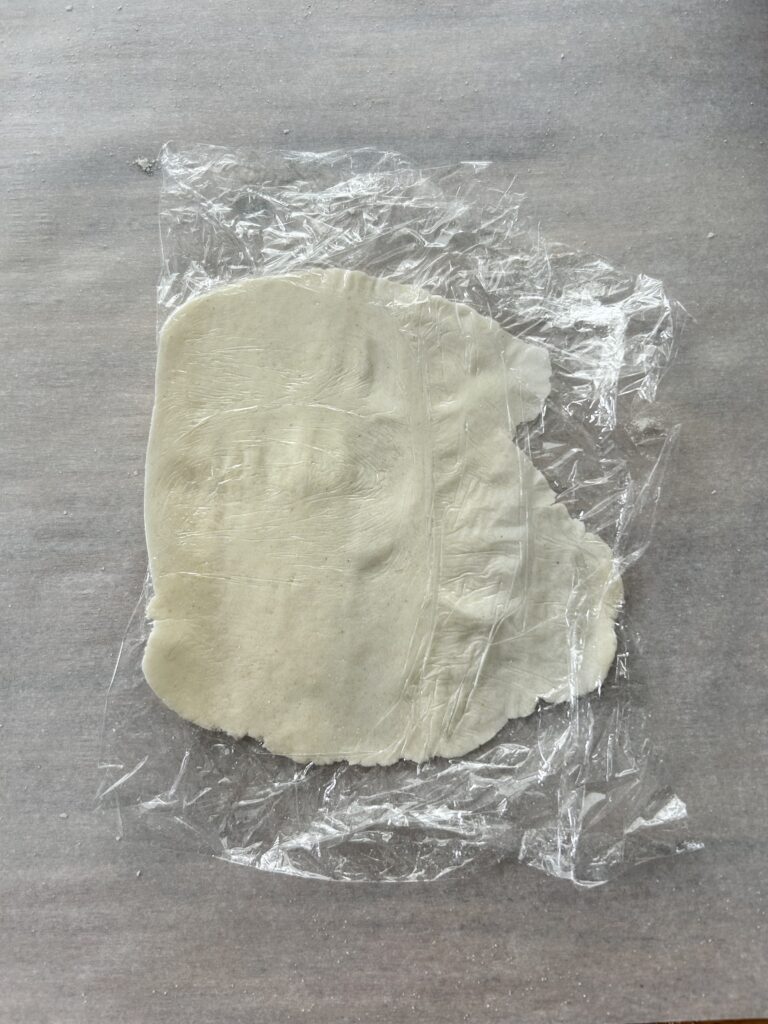
- Use a tablespoon of dough and roll it into a ball. Place a sheet of plastic wrap down and place the ball on one side. Fold over the plastic wrap to create a book.
- Using a rolling pin, roll the dough out between the plastic wrap until it is very thin.

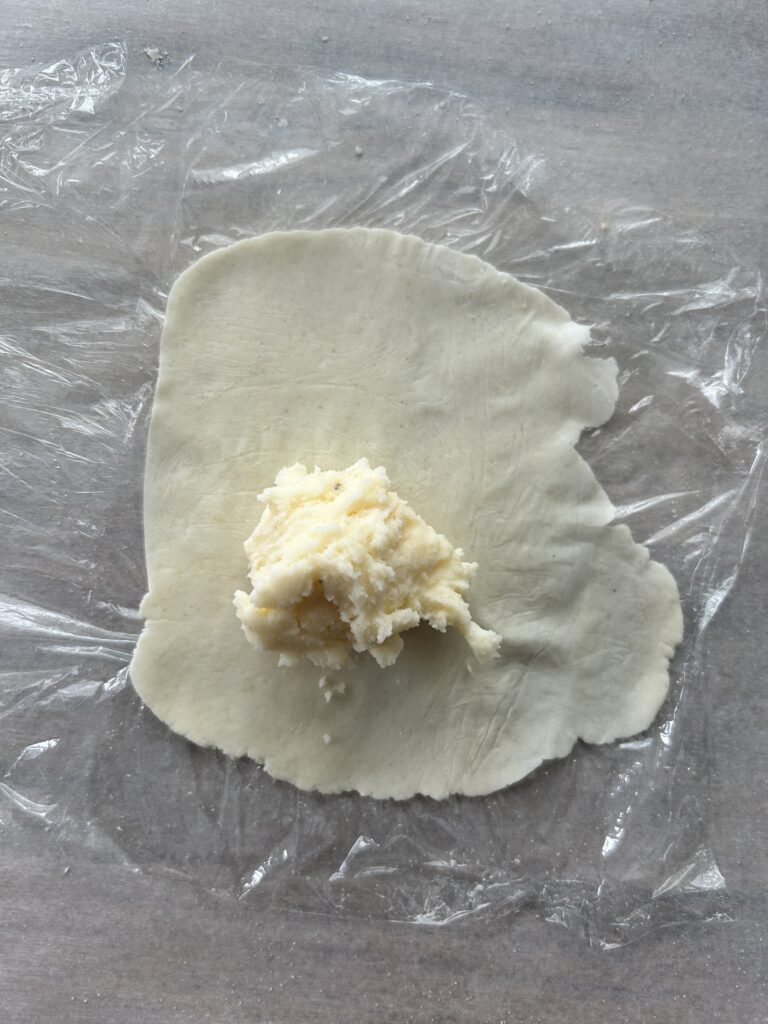
- Using a tablespoon, scoop the potato filling and place it in the middle of the perogie wrapper.
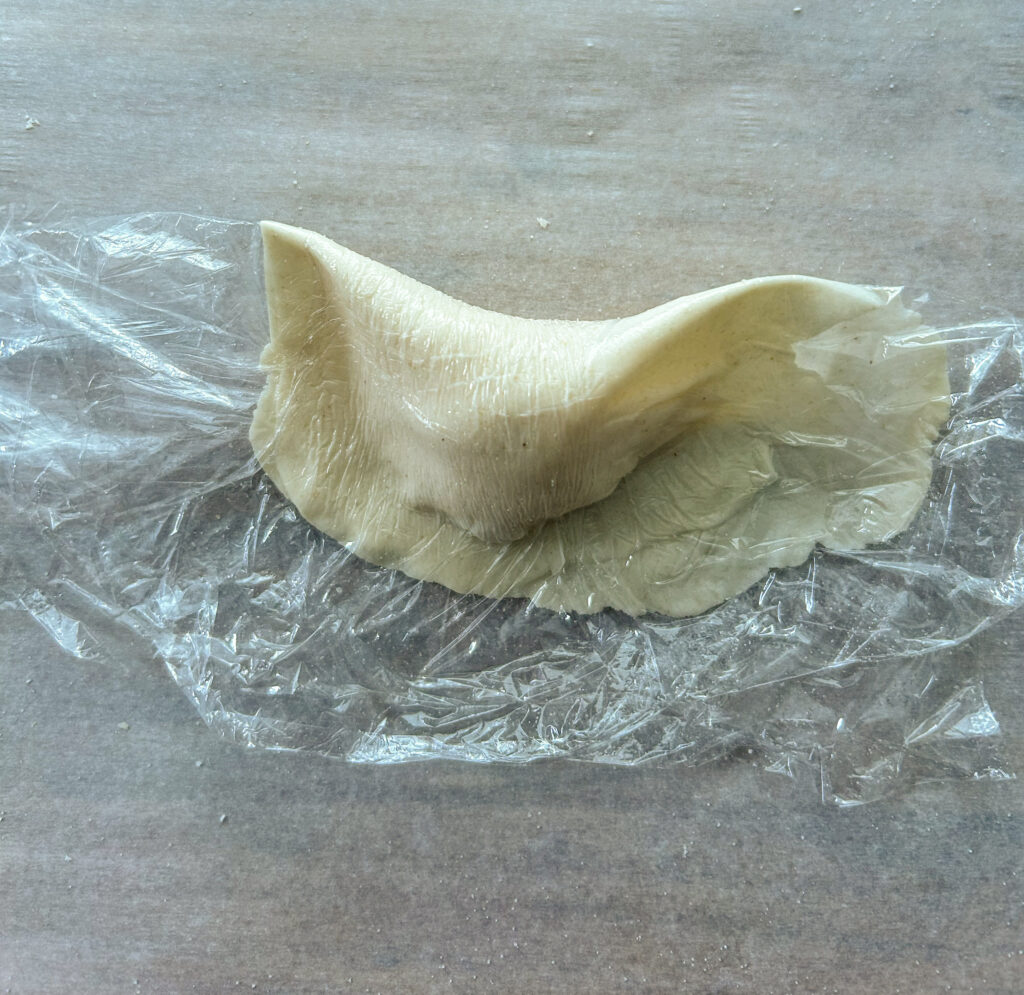
- Fold one side of the perogie over to the other and seal it around all the sides.

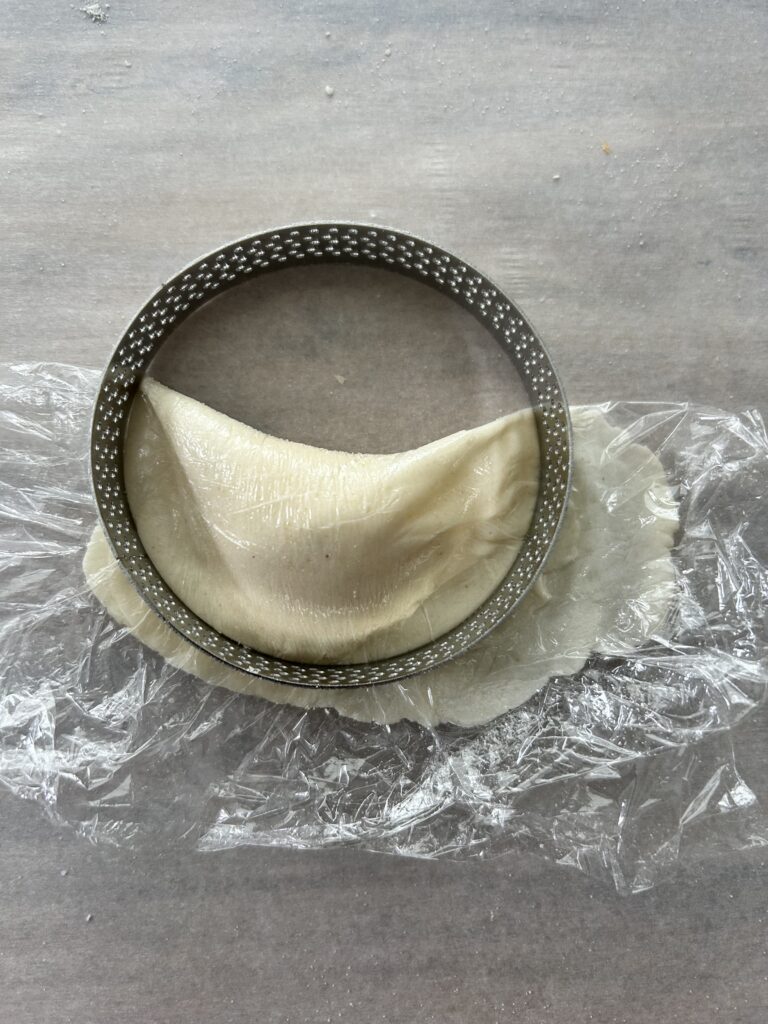
- Using a glass or a cookie cutter, cut the periogie through the plastic wrap. Remove one side of the plastic wrap and peel it off of the other side of the plastic wrap. Place the periogie on a parchment paper lined baking sheet.
- Continue this process until you have run out of dough.
- Once you have filled the tray, put it into the freezer and work on the rest.
- Once they are frozen, about an hour, remove them from the freezer and put them in a freezer bag. Store in the freezer until you are ready to use.
Cooking
- Boil a large pot of water.
- Add in the perogies to the pot of water. Cook for 5 minutes or until they float. Remove from the water.
- If you would like to pan fry, heat up a frying pan with some oil and add in the perogies that have been boiled.
- Top with onions, bacon, cheddar cheese and sour cream. ENJOY!
Did you make this recipe?
Lovely. Now let me know how you liked it and how easy it was to bake. Tag @laurabakesglutenfree on Instagram and hashtag it #laurabakesglutenfree.
While I have you here, may I suggest few you try next:
Until next time. Keep following and commenting. Join me on Instagram, where I will be revealing my secret tips and tricks! Yes, that’s right!


2 Comments
These look FANTASTIC! I’d love to see a GF Sourdough starter or discard swap here!
How did you know what I am currently working on!?! I will have a GF sourdough starter and bread recipe on here soon. Enjoy the Perogies!